An ARK: Survival Ascended private server can be set up on Windows in just a few steps and without any prior knowledge.
ARK Server: Survival Ascended – system requirements
Before you begin installing your ARK: Survival Ascended server, you must ensure that your system meets the following requirements:
- CPU : You need a powerful processor for your ARK: Survival Ascended server. Your CPU must therefore have at least four cores.
- RAM : As ARK: Survival Ascended is a game that requires a lot of memory, your server must also be equipped accordingly. You should have at least 16 GB of RAM.
- Hard disk space : for all your game data as well as your operating system to find their place on your server, the disk space must be large enough. You should plan for at least 200 GB of memory in total.
- Bandwidth : For a smooth multiplayer gaming experience, a stable internet connection and suitable bandwidth are required. This is no problem for professional server providers like IONOS. A broadband connection of up to 400 Mbit/s is always available.
- Operating system : If you want to run your server under Windows, you need a version of Windows Server. As ARK: Survival Ascended was created with the Unreal 5 engine, you should use Windows Server 2019 or newer operating system.
Note that your server requirements are highly dependent on the number of players. Especially, RAM requirements increase with the number of players.
The different types of servers
Before you can configure your game server, you must choose the server of your choice among the different options. At IONOS you choose between three different server models, which are distinguished by the following characteristics:
- Cloud Server : IONOS Cloud servers exploit the advantages of hardware virtualization. The computing power you choose can be scaled flexibly at any time and adapted to your needs. Billing is done by the minute, so you only pay for the resources you actually need.
- Virtual server (VPS) : vServers or VPS (Virtual Private Server) from IONOS are also based on virtualized computing resources. In this case, you first opt for a specific service package, which is billed with a fixed monthly amount. Here too, you can adapt your rate to your needs.
- Dedicated server : a dedicated server gives you access to fixed business equipment, reserved only for you. No need to share resources, they are entirely reserved for your use! In addition, the resources used are billed by the minute, as for a Cloud server.
Try Cloud Server for free with IONOS
Test our Cloud server for free – Test your Cloud server at IONOS for 30 days!
REST API
Unlimited traffic
VMware Virtualization
ARK Server: Survival Ascended – our economical tip for getting started
THE IONOS Cloud server is ideal for getting started. With the per-minute billing model, you only pay for the time you actually spend playing. In addition, with an ARK: Survival Ascended Cloud server, you benefit from maximum flexibility : you can thus adapt your resources according to your needs, for example according to the number of players which increases.
5 scenarios and server prices adapted from IONOS
Below we have summarized five typical scenarios for an ARK: Survival Ascended dedicated server and combined them with the most suitable server solutions from IONOS.
You can also use your ARK: Survival Ascended Windows server for other projects. Consult our dedicated Digital Guide articles to discover the servers you can set up:
Step-by-step instructions for setting up an ARK: Survival Ascended private server
Setting up an ARK: Survival Ascended server on Windows can be done in a few simple steps.
Step 1: Free the ports
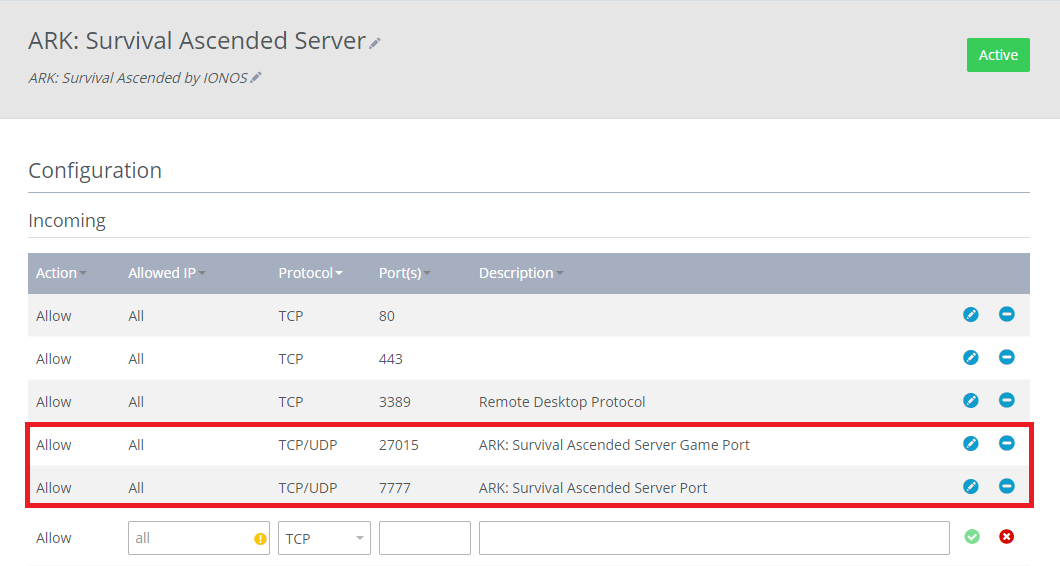
To be able to install your ARK: Survival Ascended private server, you must first free the corresponding ports on your system. These are the ports 7777 And 27015.
The way port sharing works differs depending on the hosting provider. At IONOS, this is done simply and with just a few clicks in the Cloud Panel under “Network” > “Firewall settings”. Simply add the requested sharing rules here.

Step 2: Install the Necessary Files
After connecting to your Windows server, the next step is to install SteamCMD and the necessary server files. These are necessary to start your ARK: Survival Ascended server. You can first create a folder called SteamCMD and another called ASAServer.
Then insert a file called start.bat and copy the following content into this file:
@echo off

set STEAMCMDDIR="C:\SteamCMD\"
set SERVERDIR="C:\ASAServer\"
set ARKAPPID=2430930

cd /d %STEAMCMDDIR%
del steamcmd.exe
timeout /t 5 /nobreak
curl -o steamcmd.zip https://steamcdn-a.akamaihd.net/client/installer/steamcmd.zip
powershell Expand-Archive -Path .\steamcmd.zip -DestinationPath .\
start "" /wait steamcmd.exe +force_install_dir "%SERVERDIR%" +login anonymous +app_update %ARKAPPID% validate +quit

cd /d %SERVERDIR%
start ShooterGame\Binaries\Win64\ArkAscendedServer.exe TheIsland_WP?listen?SessionName=<servername>?Port=7777?QueryPort=27015?ServerPassword=<serverpassword> -WinLiveMaxPlayers=50 -log
exit
batch
This shell script ensures that the necessary server files are downloaded and your server can start correctly. You just need to make two changes:
-
Specify the server name : you must first replace
by the name of your server. -
Set server password : you must also set your server password by replacing
by the server password. - Set the maximum number of players : you can also set the maximum number of players on your server using the variable WinLiveMaxPlayers. In our case we allow 50 players. In all cases, make sure you have the right equipment for the number you have chosen.
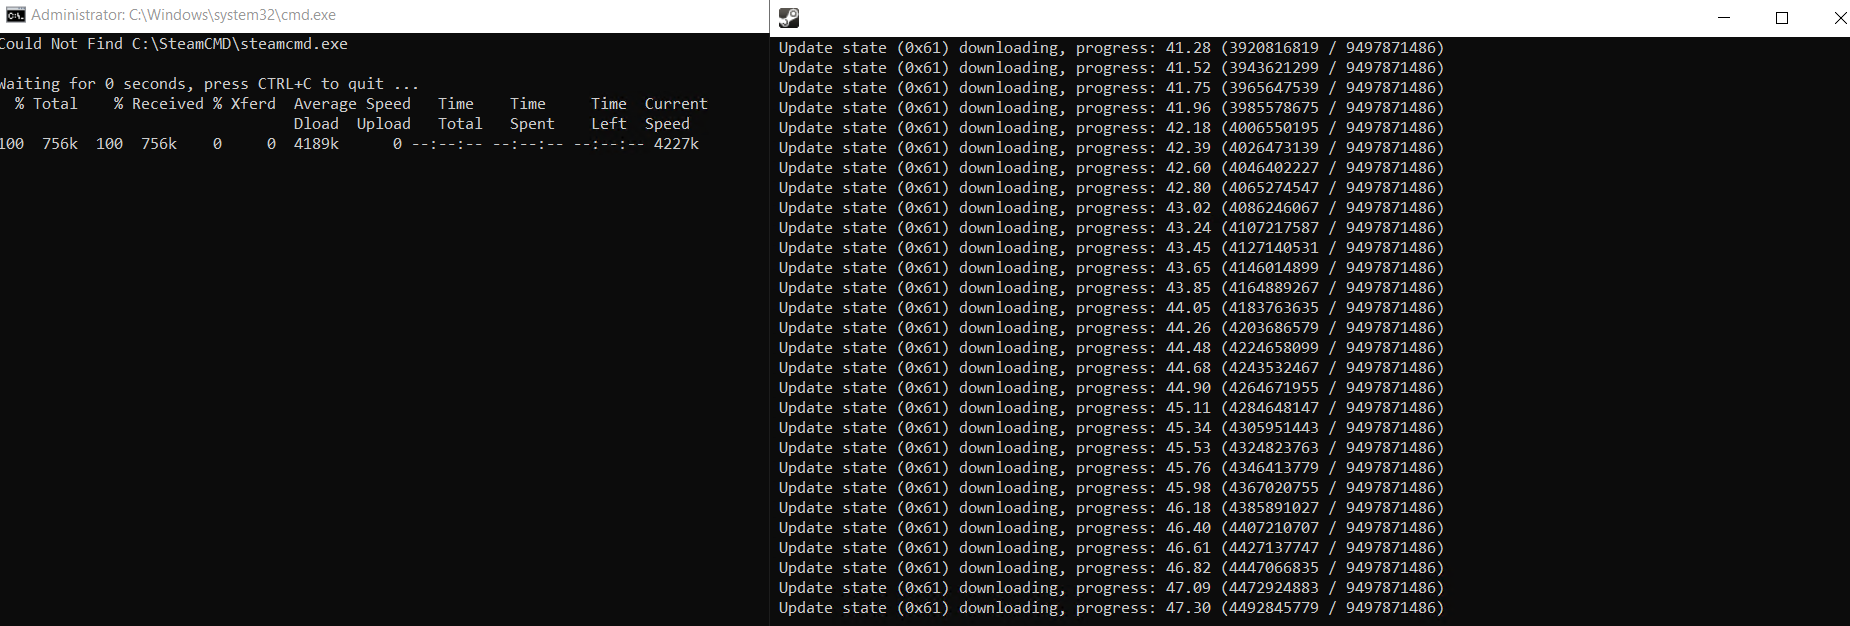
You can then run the script by double-clicking. The download process is launched in two command lines. However, this may take some time.

Step 3: Configure the ARK: Survival Ascended server
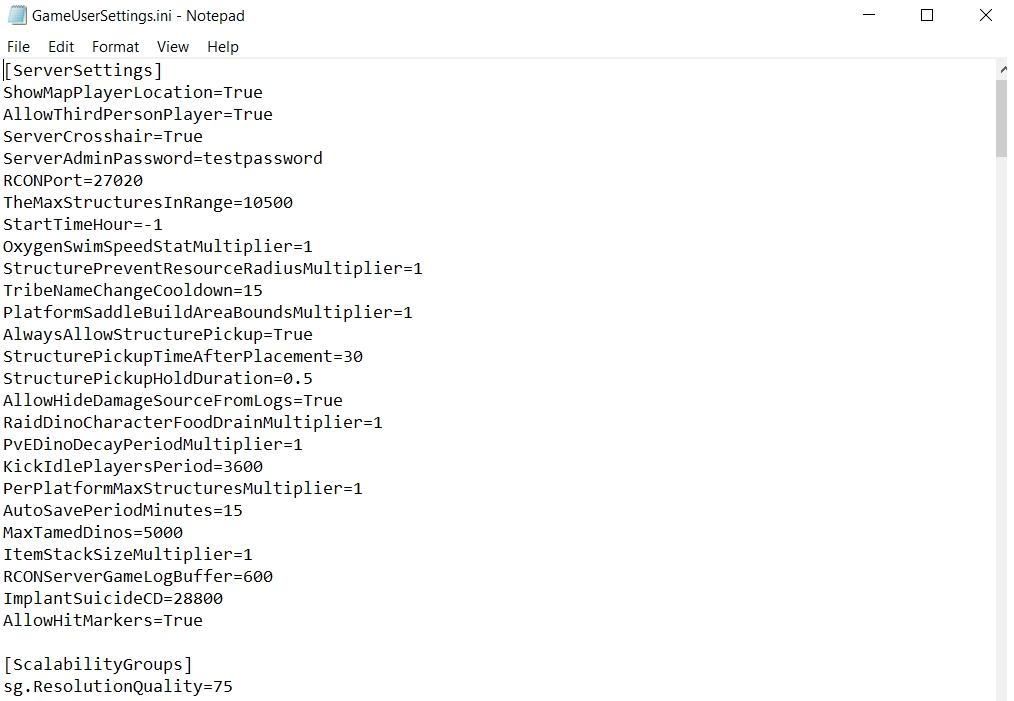
After downloading all your files, you can start setting up your ARK: Survival Ascended server. To do this, you must modify the files Game.ini And GameUserSettings.ini. These are normally found in the following file path: C:\ASAServer\ShooterGame\Saved\Config\WindowsServer. If you can’t find these files, you can simply create them manually.
In the configuration files you can make a whole series of different settings. For example, you can define the number of minutes after which scores are automatically saved.

Step 4: Start the ARK: Survival Ascended Server
You can now start your own ARK: Survival Ascended server. To do this, run the file start.bat. After a few moments, you should see the following command line, which informs you that your ARK: Survival Ascended server has been launched successfully:

If the terminal closes immediately after launching the shell script, be sure to run the file start.bat as administrator.
Step 5: Connect to the ARK: Survival Ascended server
Once your server has been launched, you and your teammates can connect to it. To do this, simply search for the name of the server you have chosen in the ARK: Survival Ascended server menu. Be sure to also view password-protected servers.

Now select your server from the list and connect to it. During this procedure, you will be prompted to enter a password. Enter here the password you indicated in your file start.bat.
Now you can enjoy the game with your friends!

If you want, you can also connect your ARK: Survival Ascended server to your own domain. Use the tool Domain checker from IONOS to see if the domain you want to use is available.


