Changing the DNS server can improve load times, prioritize secure servers, or work around name resolution issues. The preferred methods to change DNS server in Windows 11 are built-in network settings or network adapter settings. The modification is possible for both IPv4 and IPv6 addresses.
How to change DNS server in Windows 11?
Method 1: Via Network Settings
Step 1 : in the Windows search bar, type “Network” and go to “ Network and Internet “. You can also open “Settings” with the shortcut [Windows] + [i] and go to “Network and Internet”.
2nd step : Open the properties menu of your current Internet connection by clicking on “Properties”. Scroll down to ” DNS Server Assignment “. By default, DNS assignment is automatic. Click “Edit” and switch to “Manual”.

Step 3 : you now see the menu allowing you to modify the parameters of the DNS server with the “Preferred DNS” and “Alternate DNS” fields. In “Preferred DNS”, enter the primary DNS of the desired server. In “Other DNS”, enter the secondary DNS. Then save the changes. Name resolution is now done through the DNS server you chose.
Method 2: Via network adapter settings
Step 1 : open the settings menu via the Windows search bar or with the shortcut [Windows] + [i] and go to “Network and Internet”. Then select ” Advanced network settings “.
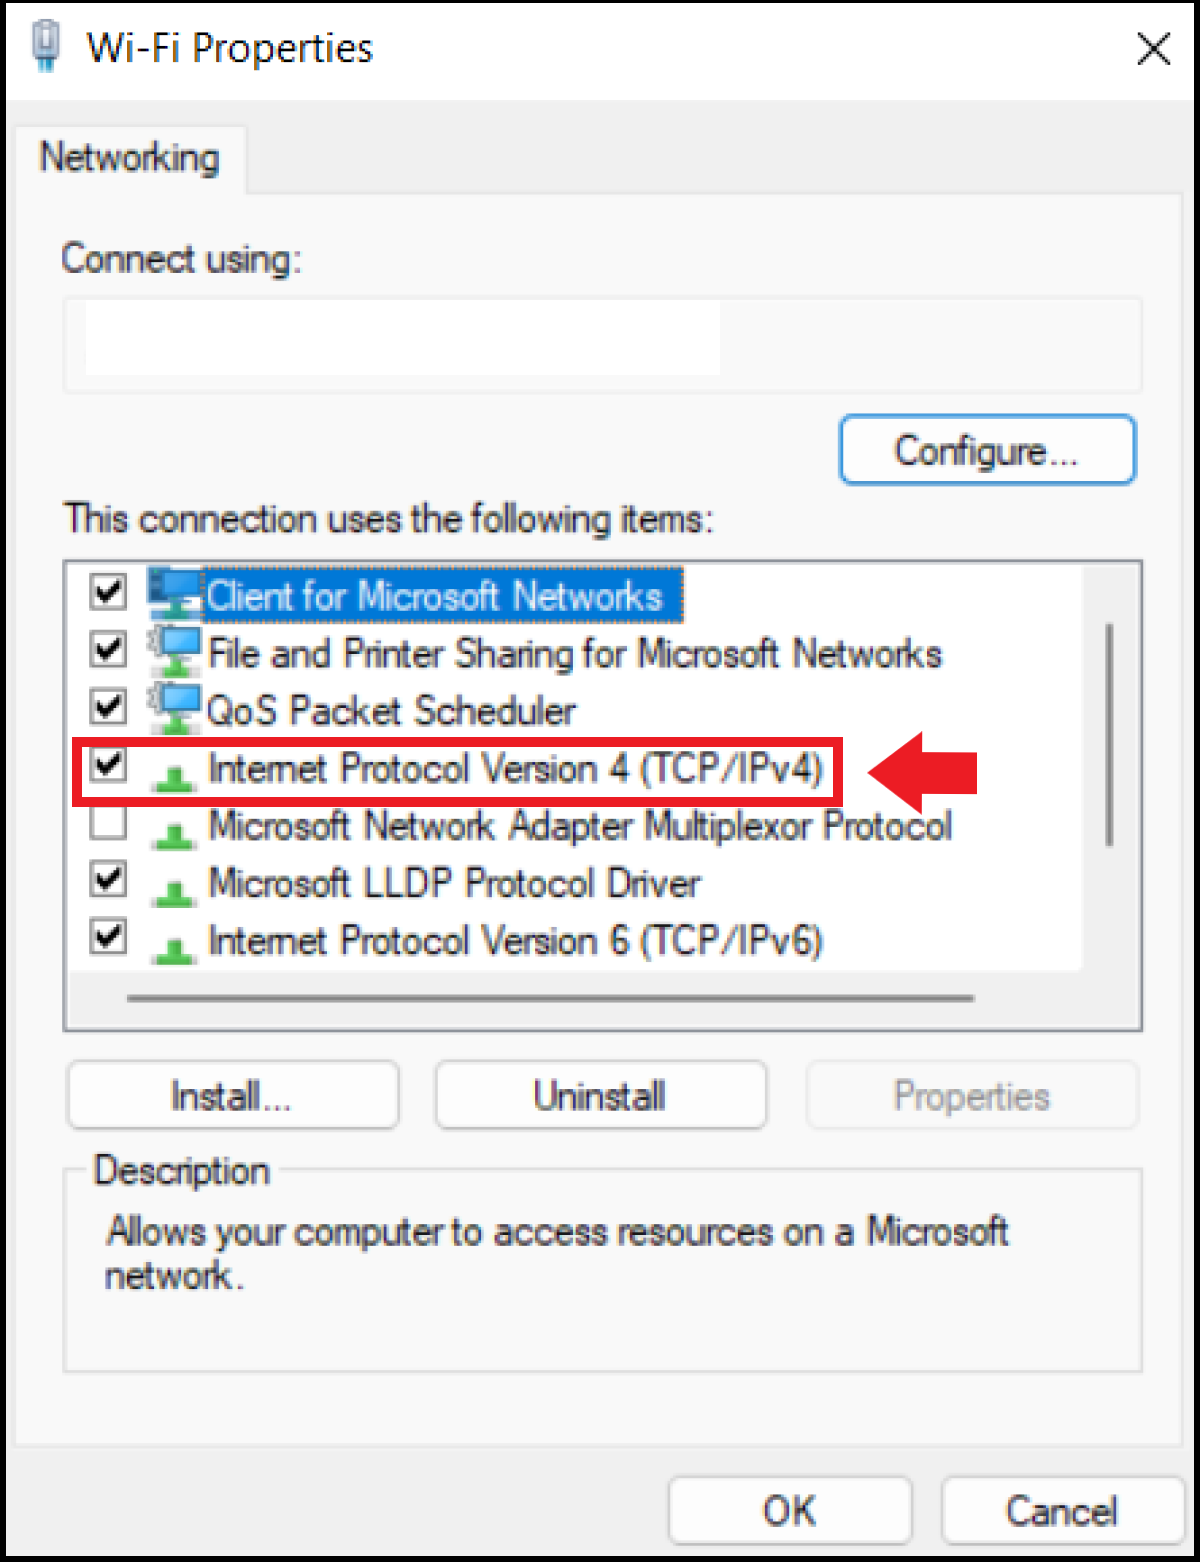
2nd step : click on ” Additional network adapter options “. You see the active internet connection. Double-click on the network connection or adapter and go to “Properties”, then “Network Management”. Note that you need administrator rights for this.
Step 3 : you now see under ” This connection uses the following » a list of different network elements. Select “Internet Protocol Version 4 (TCP/IPv4)”. If you are using an IPv6 connection, select “Internet Protocol Version 6 (TCP/IPv6)” instead. Then go to “Properties”.

Step 4 : in the window, click on “ Use the following DNS server address and enter the primary and secondary DNS of the desired server under “Preferred DNS Server” and “Alternate DNS Server”. Then confirm the changes to connect through your preferred DNS server.
Method 3: via the router
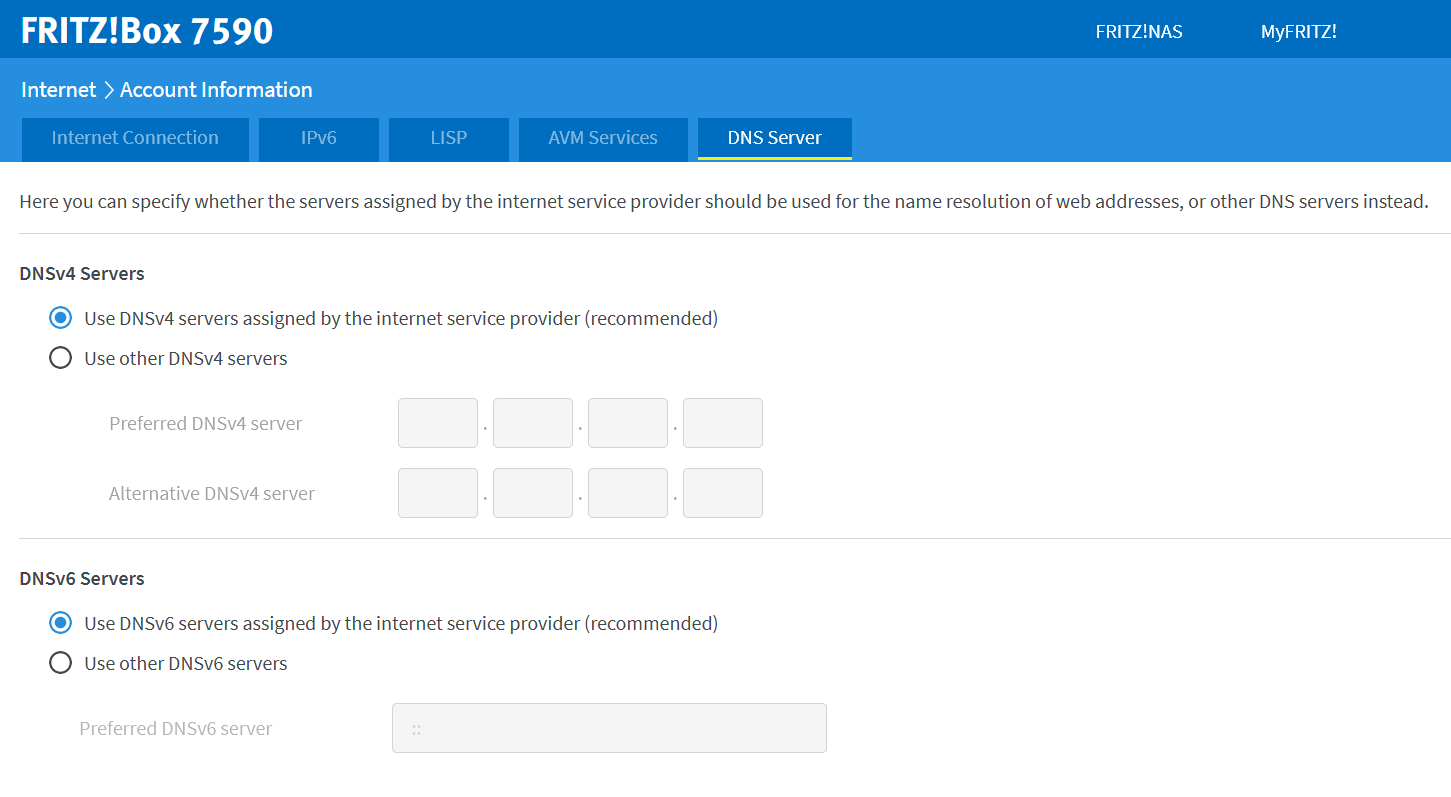
Step 1 : Do you want to use your favorite DNS server not only with your current terminal, but also with all devices on the network? In this case, change the DNS settings directly in the router. The procedure to follow depends on the router you are currently using. We are using a Fritz!Box for our example.
2nd step : After logging in to the user interface, go to the left menu on “Internet”, then on ” Access data “. Then select the “DNS Server” option.
Step 3 : depending on whether you are using IPv4 or IPv6, now select ” Use other DNSv4 servers ” Or ” Use other DNSv6 servers “. Re-enter the primary and secondary DNS of your preferred server and confirm by clicking “Apply”.

When should you change the DNS server on Windows 11?
As a directory service for Internet addresses, the Domain Name System (DNS) takes care of translating IP addresses into easier-to-read URLs, such as ‘https://www.ionos.fr’. This automatic name resolution is performed by DNS servers. In this case, the following problems can sometimes occur:
- The DNS servers used have a lower speed, which makes name resolution take longer.
- Automatic name resolutions may go through less secure servers.
- The DNS server is not responding due to a connection problem.
- An access provider prevents, through its own list of DNS filters, the resolution of a blocked URL in a defined DNS range.
In such cases, it is possible to intervene yourself and manually change the DNS server. Here we explain how to do it in Windows 11.
Manual modification of the DNS server is also possible under other operating systems:
What to watch out for when changing DNS servers
If you manually change your DNS server, visited websites may still be registered in the DNS cache under the old settings. As a security measure, flush the DNS cache so that new DNS changes take effect for all sites. This is done in a few steps via the Windows command line. Just enter the command “ipconfig /flushdns” to flush the DNS cache.


