There are different reasons why you may face a “Server error in ‘/’ application” error. Often the error message provides some additional details about the problem encountered. Most of the time the server side error message has something to do with IIS (Internet Information Services) or ASP.NET.
Required configuration
- A Cloud Server running Windows Server 2012
-
ASP.NET installed
Virtual servers (VPS) with IONOS
Powerful, cost-effective VPS hosting for running your custom applications, with personal advisor and 24/7 support.
SSL certificate
100% SSD storage
Ready in 55 seconds
Restart IIS
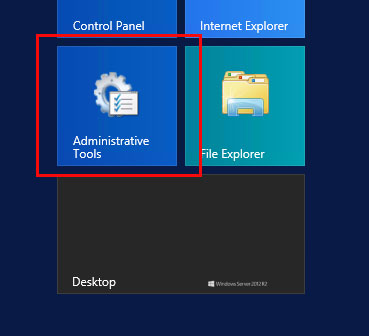
The « Server error in ‘/’ application » error may occur if IIS needs to be restarted. You can restart IIS from Internet Information Services (IIS) Manager. From your remote desktop connection, click the « Start » button in the lower left corner and select « Administrative Tools. »
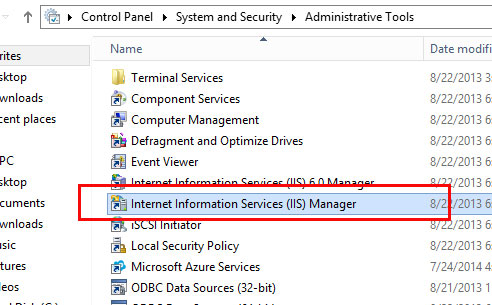
Click on » Internet Information Services (IIS) Manager » to launch the IIS manager.
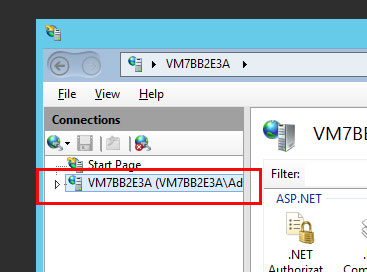
Select the affected server from the left side panel.
To the right of IIS Manager, click « Restart » to restart IIS services.
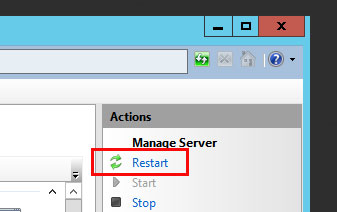
Update URL
Under certain circumstances, a 404 error may appear as a « Server error in ‘/’ application » error. When this is the case, the error description within the browser will specify that the error occurred because the file is missing or was renamed.

Add MIME type
If you access a file that has an extension that does not have permission to run on the server, you will see the error « Server error in ‘/’ application » accompanied by the following explanation: « This type of page is not served.”
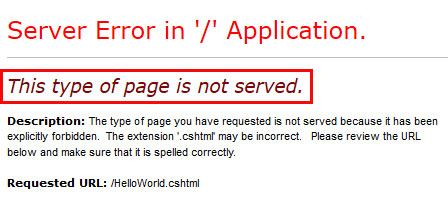
When looking for a solution to the “Server error in ‘/’ application” error, make sure, first of all, that you are using the correct file name. The « Server error in ‘/’ application » error can occur if there is a typo in the file extension, for example, if a file name or URL displays test.htl instead of test.html.
If the file name is correct, then you may need to add the MIME type to server. MIME stands for Multipurpose Internet Mail Extensions. The MIME type is used to indicate what type of document it is. In our example, we are trying to execute a file titled HelloWorld.cshtml. File extension .cshtml is not associated with any MIME type by default on Windows 2012.
You can add the MIME type in the IIS manager. To open IIS Manager from your remote desktop connection, click the start button in the lower left corner and click « Administrative Tools. »

Click “IIS Manager” to launch IIS Manager.

Click on the server in the left side panel.

Now click on “Sites”.
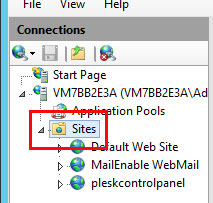
Then click on your domain. In the central panel, double-click “MIME Types”.
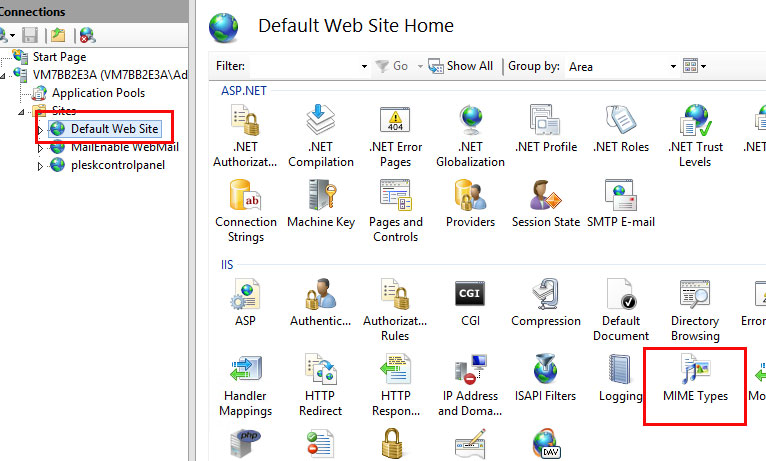
Under the “Actions” column on the right, click “Add”.
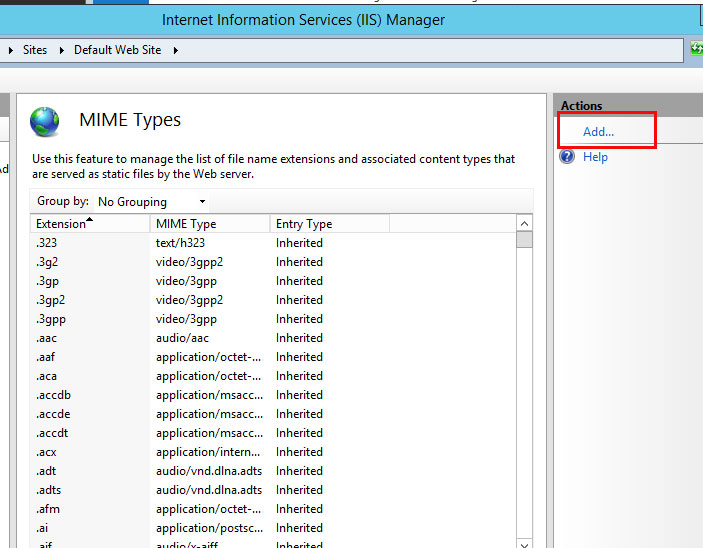
In the pop-up window that appears, fill in the “File name extension” and “MIME type” fields, then click “OK”.
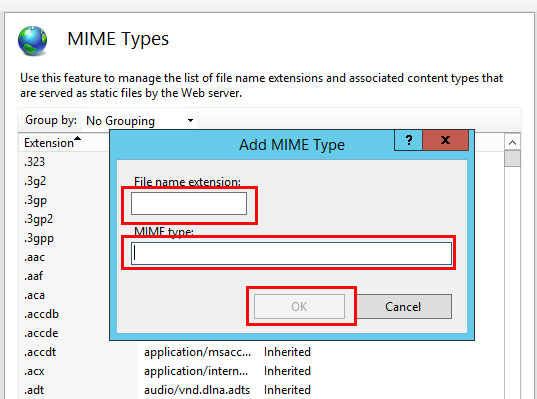
You may need to do an Internet search to find the correct MIME Type for your file extension.
Check .NET Version
Some programs, features, and file types only work under certain versions of .NET.
You can find out your version of .NET from the IIS manager as well. To open IIS Manager from your remote desktop connection, click the « Start » button in the lower left corner, then select « Administrative Tools. »

Click on » Internet Information Services (IIS) Manager » to launch the IIS manager.

Click to expand the server in the left side panel of the window.

Click on “Application Pools”
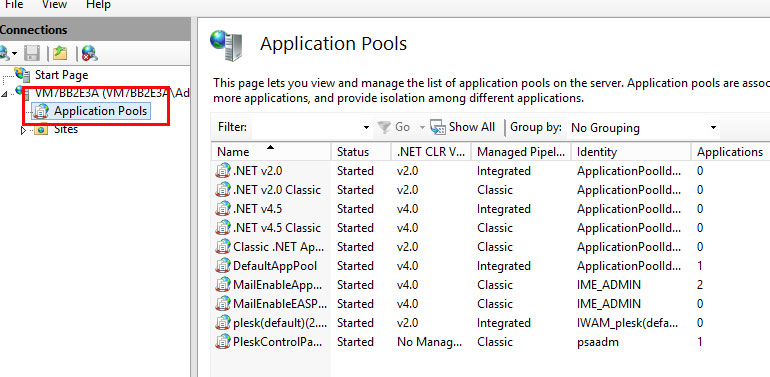
Right-click on the domain name and click “ Basic Settings « .
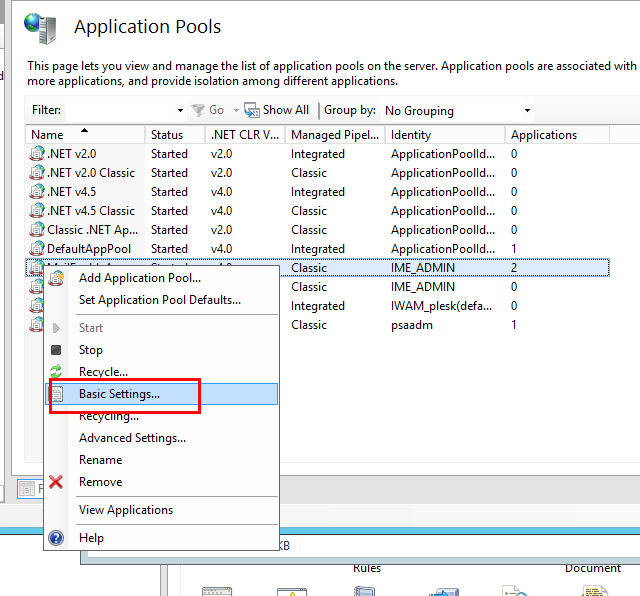
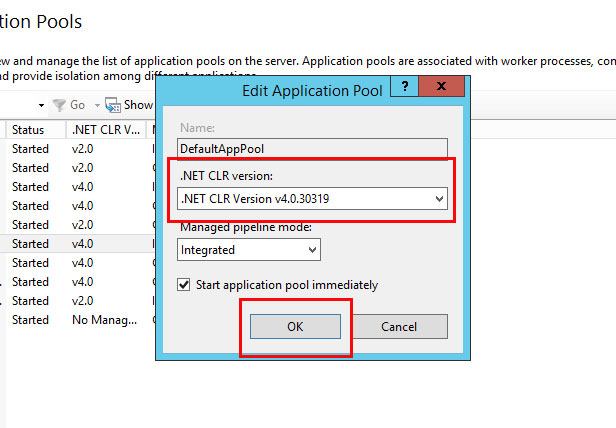
In the pop-up window that appears, select the .NET version from the drop-down menu, then click “OK” to confirm your choice.
