With the Microsoft Outlook email program, you can, if you wish, configure the automatic forwarding of incoming emails to other email accounts. It is also possible to set up a redirection. To do this, you need to look at your account settings and the “Rules” tab. We show you how to do it step by step.
Outlook: configure automatic email forwarding (Microsoft 365, Outlook 2021, 2019, 2016)
With Outlook, it is possible to set up automatic email transfer in just a few clicks. The procedure to follow differs depending on whether you are using Windows or macOS.
Outlook Email Forwarding on Windows
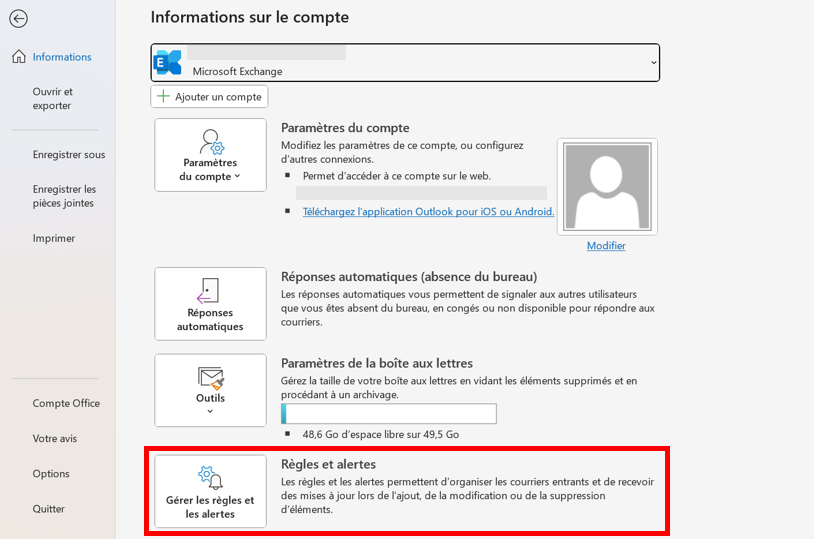
Step 1 : select the “File” tab in the menu bar and click on the “Rules & Alerts” submenu.
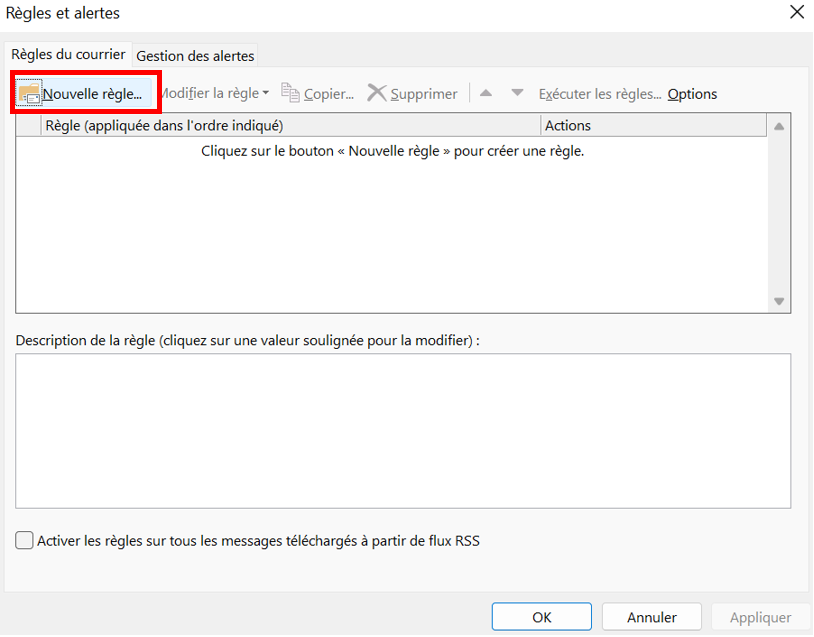
2nd step : click the “New rule…” button to open the Message Management wizard.
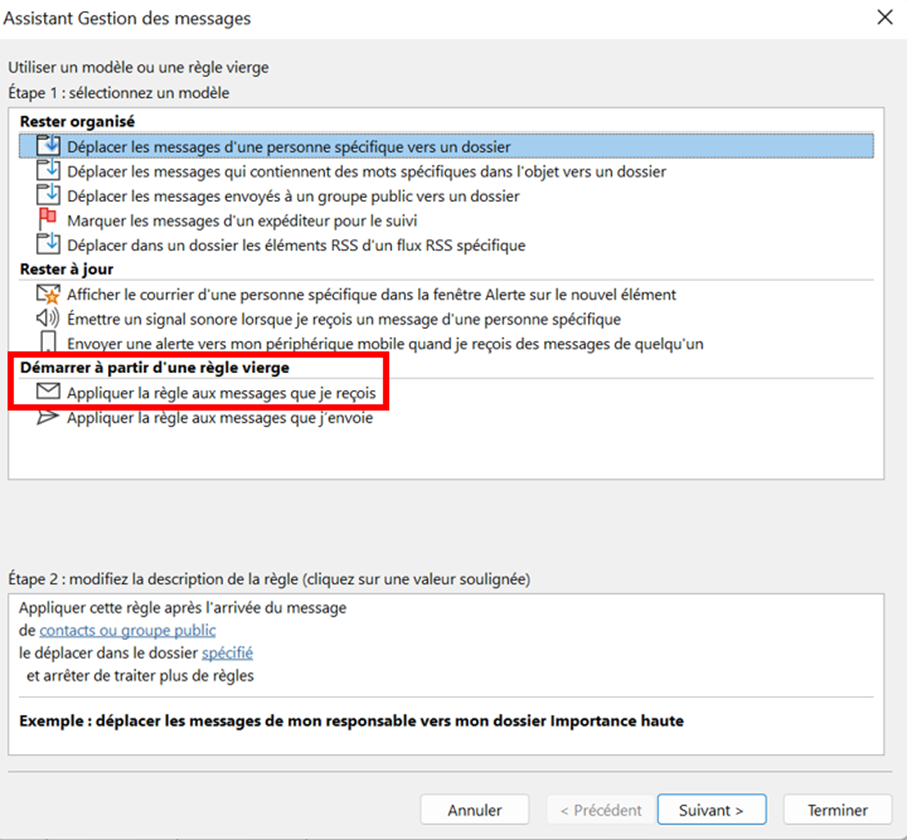
Step 3: The Outlook Message Management wizard opens. It allows you to use templates or create your own rules. For automatic forwarding of emails, go to “Start from a blank rule” and select “Apply rule to messages I receive”. Confirm by clicking “Next”.
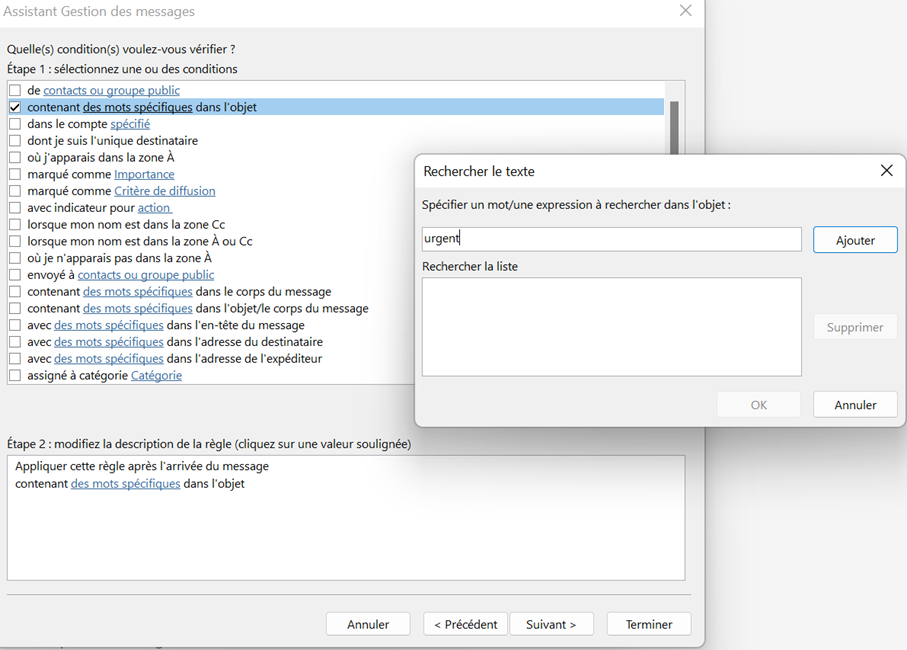
Step 5: The Message Management wizard then prompts you to choose conditions. If you do not want to set a condition, skip this point by clicking “Next”. In this case, the rule applies to all incoming messages.
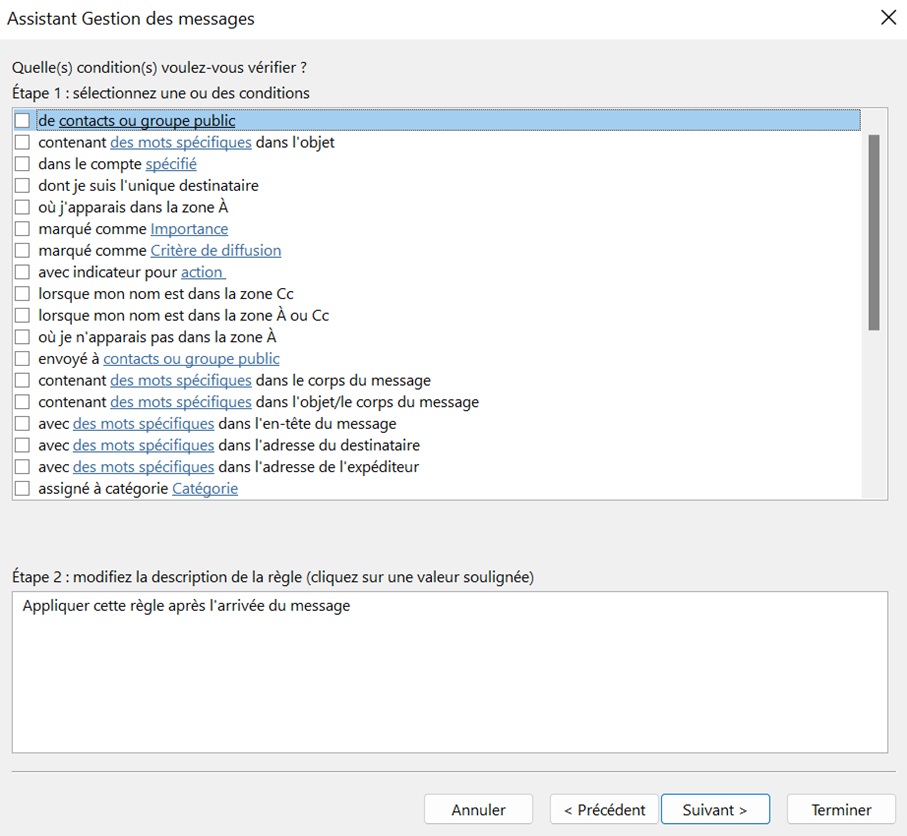
If you want to link your rule to a condition, check the box corresponding to your wishes and click on the words appearing in blue (underlined value) under “Step 2: modify the rule description” to enter your details (for example the address of a sender which will trigger the transfer or arrival of a message containing a specific word).
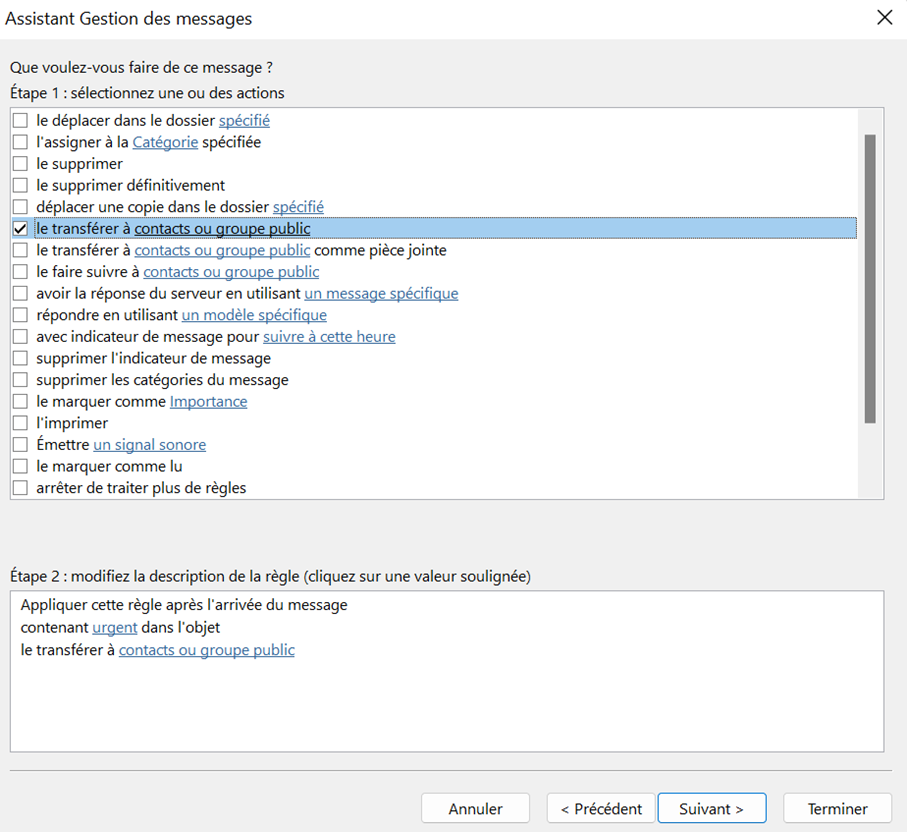
Step 6: After clicking “Next”, you can then define the action to apply to all messages that meet the previously defined condition. Then select the option “transfer it to contacts or public group”. If you want to set up a redirect instead, select “forward it to contacts or public group.”
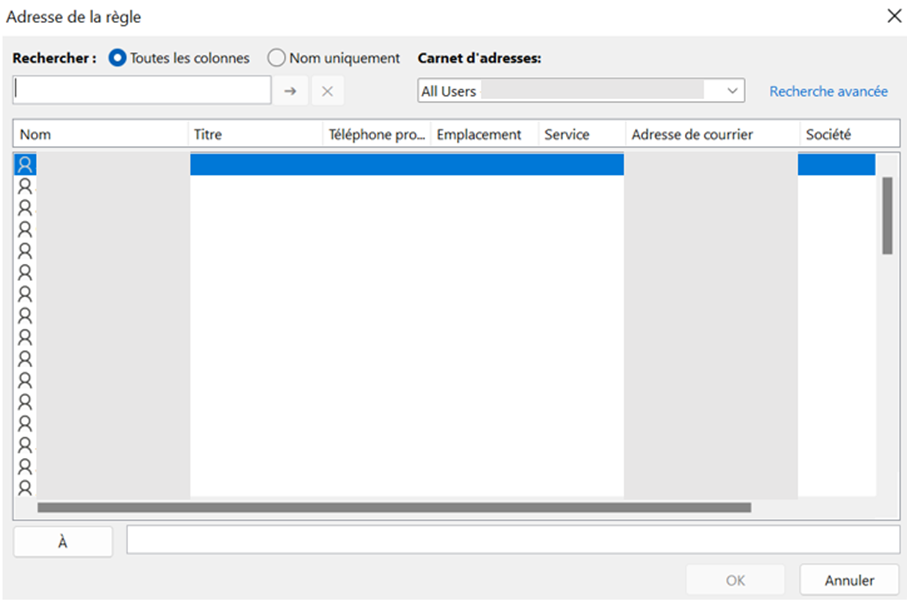
Step 7: Specify a person or group to forward messages to. To do this, click on the blue text in the “Step 2” field, then select a person or group of recipients from your address book.
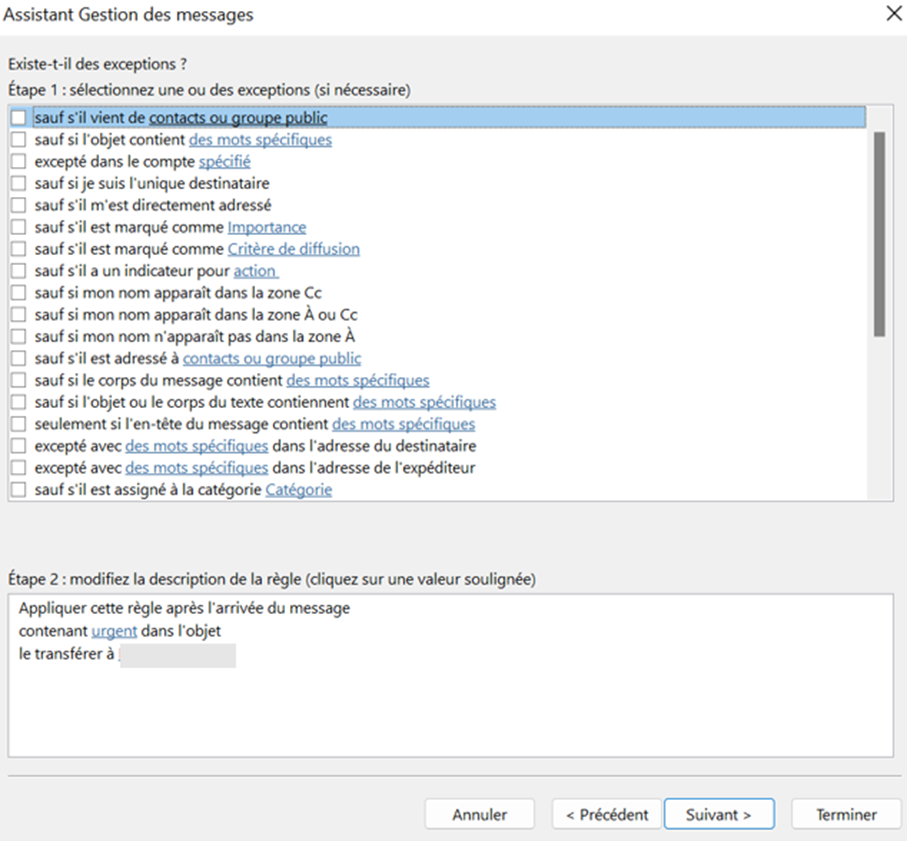
Step 8: if necessary, define exceptions for the rule.
Step 9: Name the rule you have configured and specify whether it should apply only to new incoming messages or to all emails already saved in the Inbox (in which case, check “Run this rule on messages already in Inbox” ). Complete the setup process by clicking “Finish”.
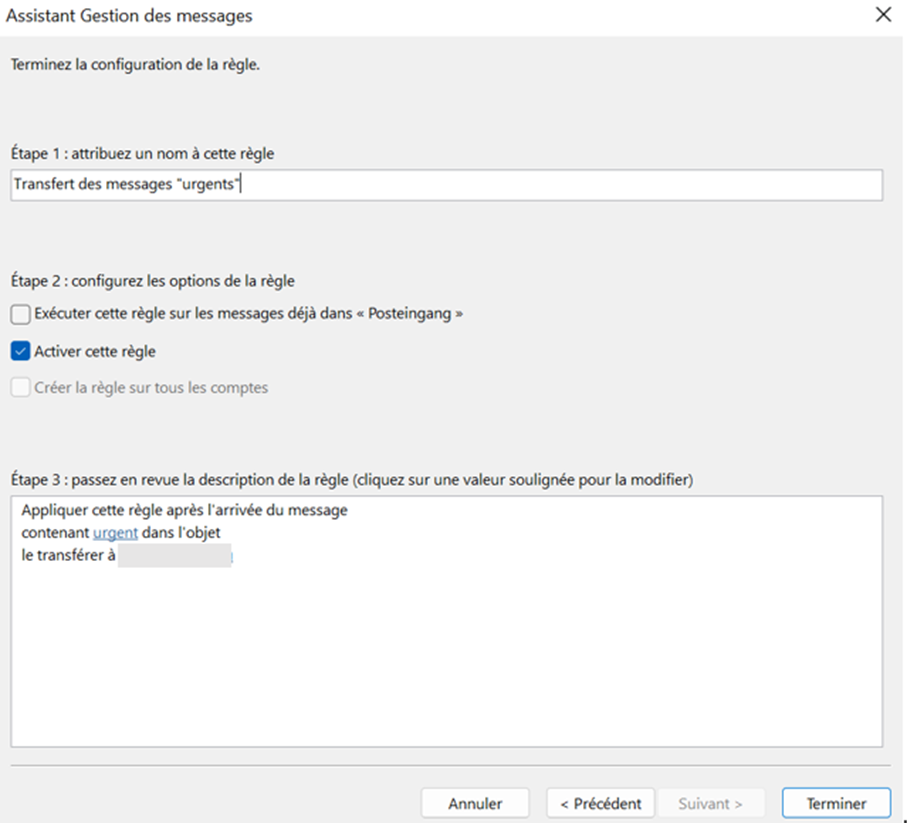
The newly created rule is now displayed in the “Rules and Alerts” dialog box.
Are you looking for an Office pack adapted to your business? Microsoft 365 Business from IONOS is exactly what you need! This software package includes both Outlook and various other Microsoft applications.
Forwarding Outlook emails on macOS
Step 1 : To transfer emails with Outlook for macOS, first select the “Rules” option in the menu bar, then “Edit rules…”.
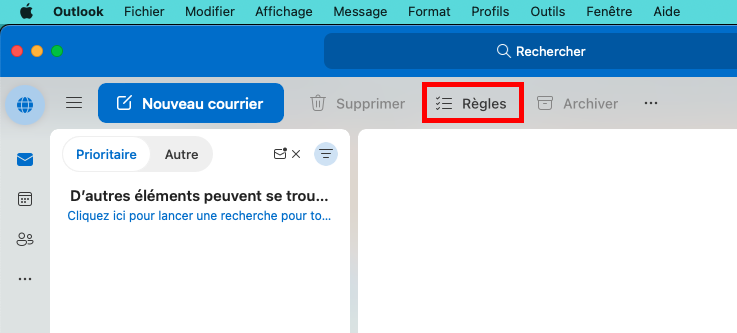
Microsoft has adapted the presentation of Outlook on macOS. However, it is still possible to continue using the old display, which looks very similar to the Windows version.
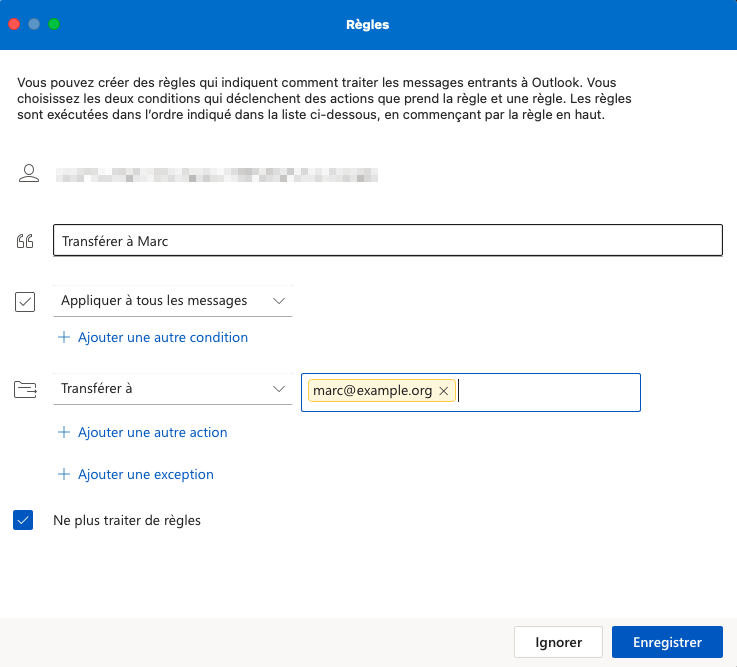
2nd step : now configure the desired rules. First, set a condition for which the transfer should be performed. For example, this could be a specific sender. You can also define multiple criteria.
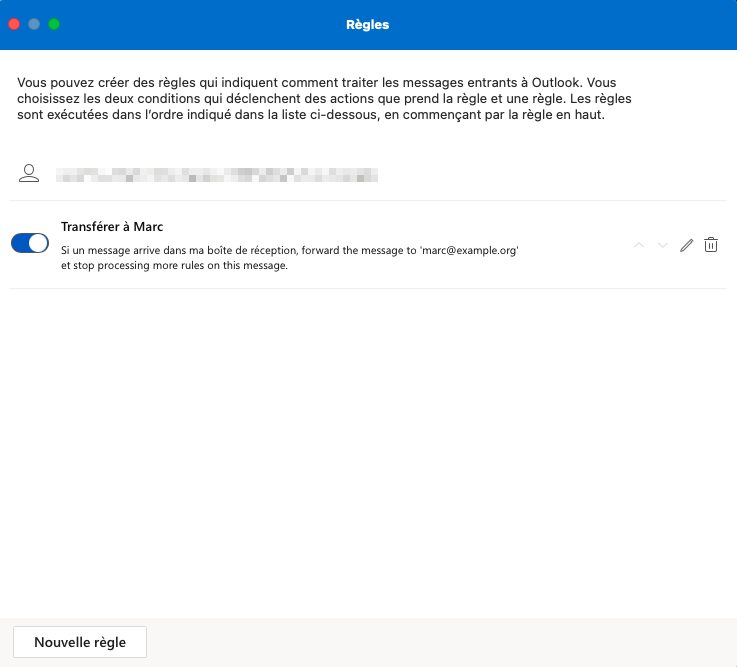
Step 3: Now choose “Forward to” and then indicate the email address(es) of your choice. For example, you also have the possibility of classifying received emails in a special folder. By clicking “Save”, you complete the creation of the rule.
Google Workspace with IONOS
Make teamwork easier! Enjoy professional email through Gmail plus all Google tools in one place.
Videoconferencing
File Sharing
Mobile working
Configuring email forwarding: Outlook Web version
Outlook on the Web (formerly Outlook Web Access, abbreviated OWA) is a Microsoft service that allows you to access your Outlook email from any browser. The web application is integrated with the Microsoft 365 online service and offers a range of functions similar to installing the desktop email program. With the web version of Outlook you can also create automatic email forwarding rules.
Step 1 : connect to Microsoft Outlook.
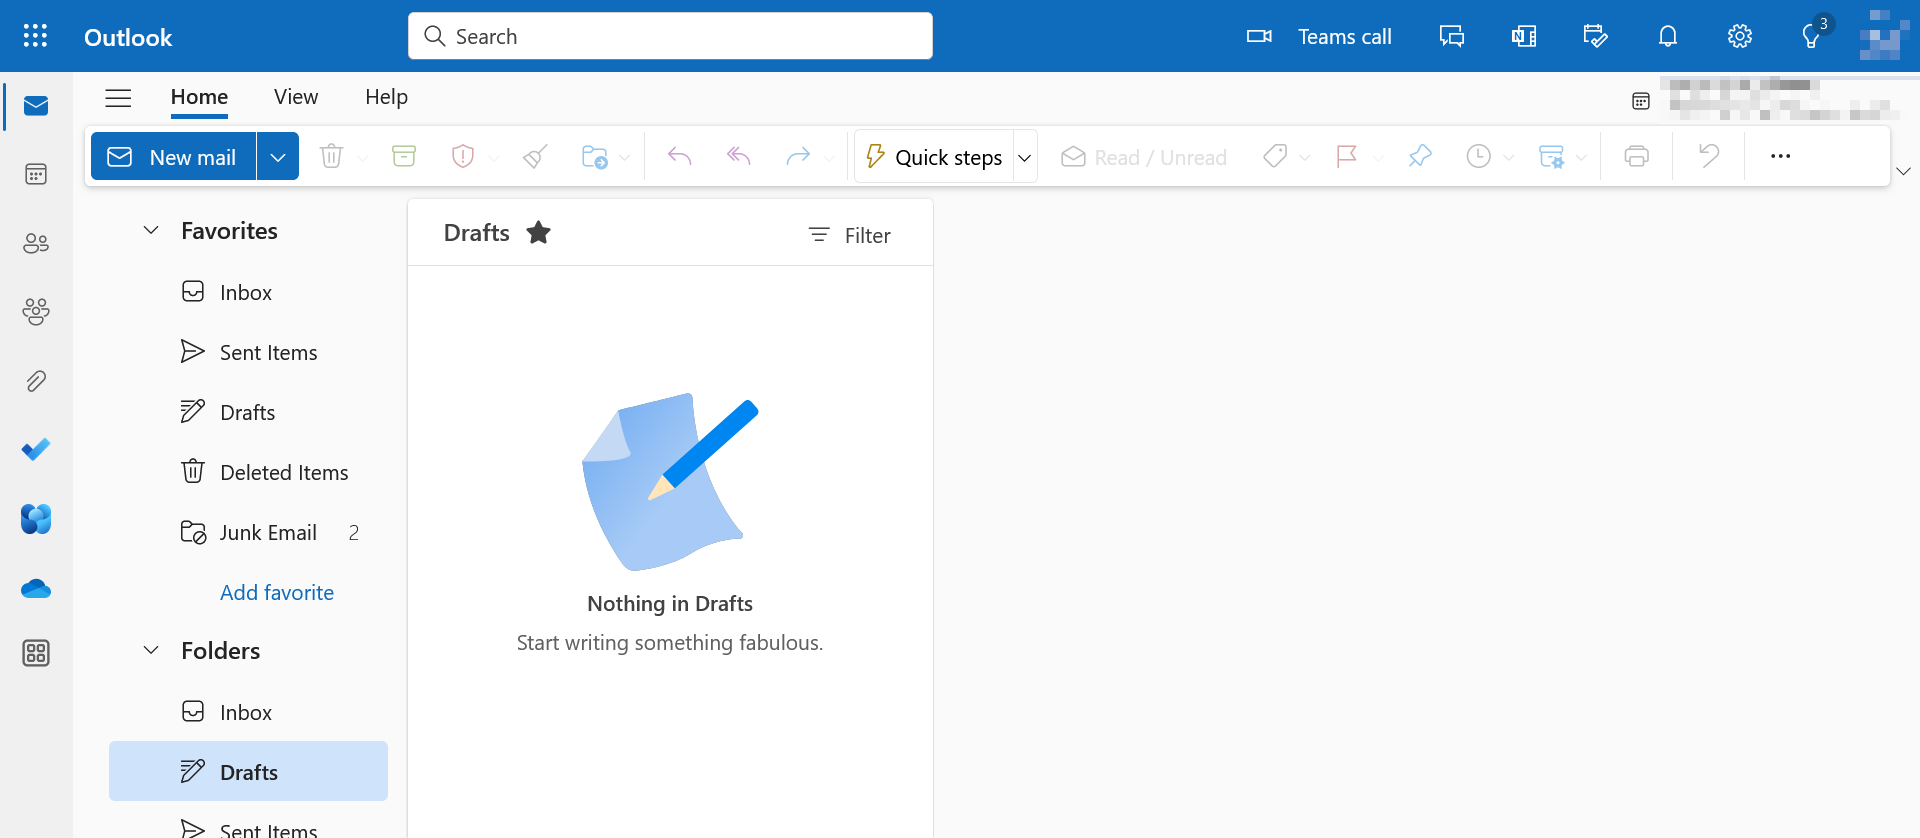
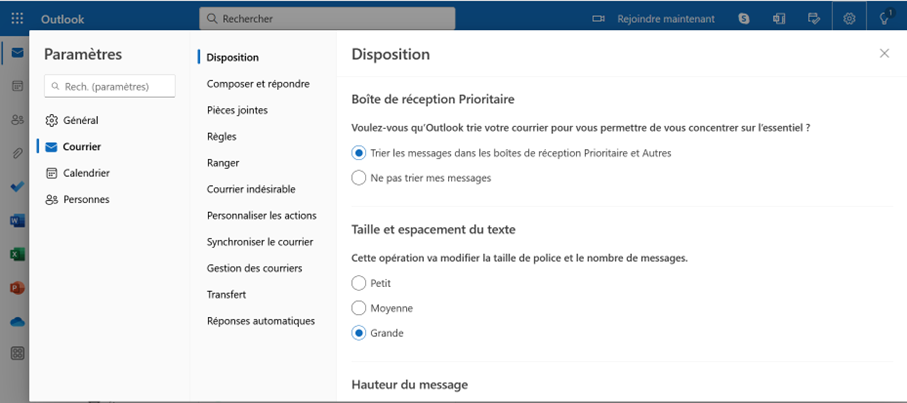
2nd step : click on the small gear next to your username to display the settings, then on “Mail”.
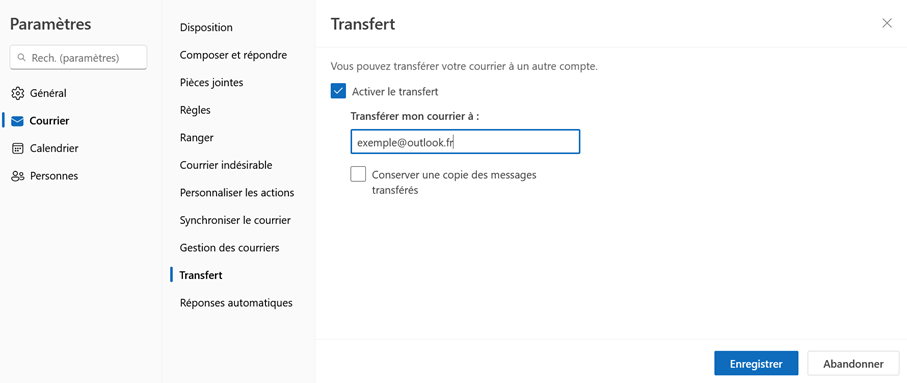
Step 3: in settings, now navigate to “Transfer” menu option. Here you can define the email address to which your Outlook emails should be forwarded.
If you want to configure the transfer more precisely, click “Rules”. You can create specific rules there like in the desktop application.
What is the difference between email forwarding and forwarding?
Microsoft Outlook distinguishes between email forwarding and email redirection. With forwarded messages, the process remains transparent. If you want to reply to a forwarded message, Outlook automatically selects as the recipient the account that forwarded the message, but not the actual sender of the message. In the case of a redirection, however, you may have the impression that the redirected emails come directly from the sender of the message. If you want to reply to a redirected email, the response is sent directly to the sender, but not to the email account originating the redirection.
Email address with its own domain name!
Create a personalized address and show your seriousness on the Internet with a domain name included!
Professional
Secure
24/7 support
Why forward received emails?
You may have many reasons to configure automatic email forwarding in Outlook:
- Most users have multiple email accounts from different providers. Automatic email forwarding allows emails to be centralized to a main inbox if necessary.
- On a daily basis in the working world, messages received from customers are useful not only for the recipient of the account, but also for colleagues or superiors. With automatic transfer, you can ensure that all important information is available to all parties involved without delay.
- Email forwarding is also useful in case of absence. If messages from your customers or business partners are received during holiday periods, it is recommended that you forward them to a replacement so that they can still be processed.


