Nginx web server software installs in just a few steps on Ubuntu. Here is the procedure to follow as well as the minimum server configurations.
What is the minimum web server configuration for Nginx?
Nginx requires a server with the Linux operating system. In this area, Ubuntu has proven itself as a simple and stable Linux distribution. The capacity needed for the Ubuntu server depends on the project. A small hardware configuration may already be enough for a simple website. Nginx is known for its high performance while saving system resources.
Here is the minimum recommended configuration:
- 100 GB disk space;
- 6 GB of RAM;
- 1 single core processor.
A Cloud Flex server with IONOS allows you to freely configure the hardware. A major advantage: if your requirements increase, you just have to adapt your configuration to your needs.
Cloud server is not always the best solution for every project. At IONOS, you can also rent a dedicated server with exclusive hardware access, or a vServer (VPS) with full virtualization.
To access your web server from the Internet, you will also need a domain name.
Installing Nginx on Ubuntu 20.04: Step by Step Guide
Installing and configuring Nginx on Ubuntu is done in a few simple steps.
Step 1: Download and install the software
Before installing Nginx, first update your system’s package manager:
sudo apt update
sudo apt upgrade
bash
Then install Nginx on your system:
sudo apt install nginxbash
All you have to do is confirm the installation process.
Step 2: release the port
To be able to access your web server from the outside, you must configure your firewall. In Ubuntu, this procedure is supported by the “ufw” program. For a configuration as restrictive as possible, choose the following command:
sudo ufw allow 'Nginx HTTP'bash
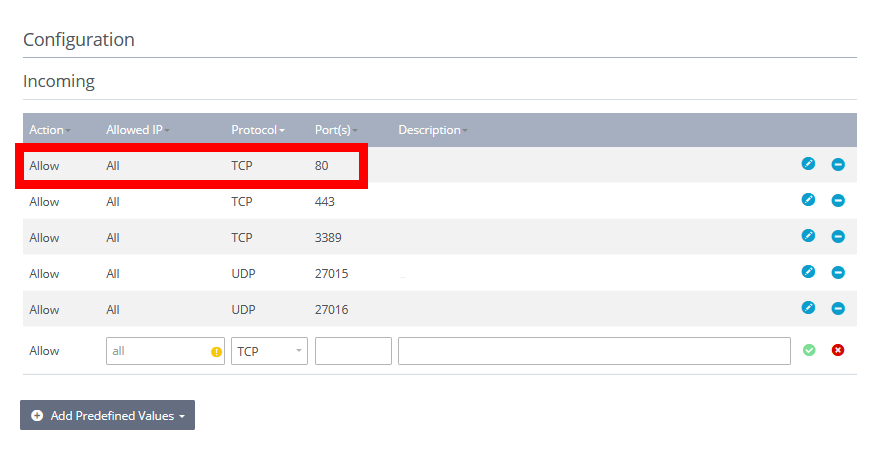
This frees up the port 80. You may need to repeat this operation in the host settings. In the IONOS Cloud Panel, for example, this function can be found under the “Firewall” section.

Step 3: Test the server, start and stop
Now check if the installation of the web server was successful. To do this, enter this command in the terminal:
systemctl status nginxbash
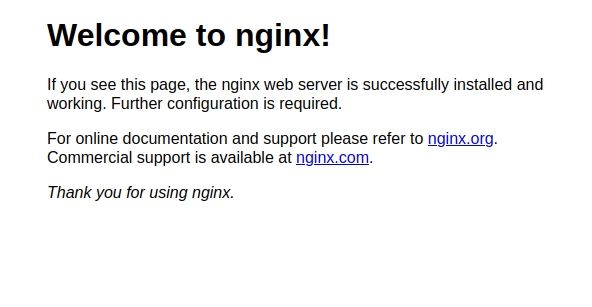
The output should show the server status as “active”. You can also call the server from the browser. To do this, enter server IP address in the browser address line.

It is also possible to start the server manually:
This is not the only command to control an Nginx web server, there are others:
- stop : immediately stops the running web server;
- quit : stop the running web server once the running processes are finished;
- reload : load the configuration file again.
These commands always follow the following syntax:
Step 4: Create a test page
Nginx automatically generates a website with welcome message on Ubuntu 20.04. The corresponding HTML document is in the folder /var/www/html/. It is now possible to create other HTML documents in this same folder in order to build your own website. However, it is better to leave this folder intact and create a new folder for your own domain. To do this, use the following command:
sudo mkdir -p /var/www/example.com/htmlbash
In this example, we use the domain name monsiteweb.com ; to follow this tutorial, use your own domain name instead. Don’t forget to also give yourself administrator rights:
sudo chown -R $USER:$USER /var/www/monsiteweb.com/html
sudo chmod -R 755 /var/www/monsiteweb.com
bash
In this new folder, create your first HTML documentor the home page of your site:
sudo nano /var/www/monsiteweb.com/html/index.htmlbash
Of course, you can organize this home page as you see fit. Here is a simple example that you can fill with your own content:
<html>
    <head>
        <title>Monsiteweb</title>
    </head>
    <body>
        <h1>Test</h1>
        <p>Bienvenue sur votre premier site Internet<p>
    </body>
</html>
bash
Save and close the document.
At this time, the web server still plays the old standard greeting when connecting to the website. You need to let Nginx know that it is the new content that should be displayed. To do this, create a new configuration file in the Nginx folder:
sudo nano /etc/nginx/sites-available/monsiteweb.combash
In this new file, insert a server block:
server {
        listen 80;
        listen [::]:80;

        root /var/www/monsiteweb.com/html;
        index index.html index.htm index.nginx-debian.html;

        server_name monsiteweb.com www.monsiteweb.com;

        location / {
                try_files $uri $uri/ =404;
        }
}
bash
Be sure to enter the correct free port here. If you followed our instructions, you should also have freed port 80. Save the file and close it.
You have created this configuration file in the “sites-available” folder and now need to create a link in the “sites-enabled” folder. When it starts, Nginx uses this folder to determine which site to display.
sudo ln -s /etc/nginx/sites-available/example.com /etc/nginx/sites-enabled/bash
Restart the server:
sudo systemctl restart nginxbash
If you now view your domain in a browser, you will now see your new site.


