If you want to install WordPress on Ubuntu, it is better to bet on the LAMP battery, a combination of the Linux distribution, the Apache web server, MySQL or MariaDB and the PHP scripting language. Installation and configuration of the content management system is carried out as usual via the terminal.
Why use WordPress with Ubuntu?
If you want to manage a web project with the WordPress CMS, you can use classic server operating systems as a basis. It is also possible to use an Ubuntu server as a hosting system. It’s even a good choice in many respects:
- Ubuntu is open source and usable for free
- Security-related errors and weaknesses are quickly fixed
- You benefit from a great freedom of administration
- Ubuntu is less often the target of cybercrime than Windows systems
- It benefits from integrated tools allowing remote access
You are completely free to use Ubuntu with or without graphical user interface to create your WordPress site. Your know-how is essential here: if you know the Linux world well, you can do without a graphical interface and thus save money. valuable material resources.
WordPress with Ubuntu: what are the prerequisites?
Just like Ubuntu, WordPress is not very demanding when it comes to the hardware of the hosting environment. If you want to run a simple site, WordPress generally needs 512 MB of RAM and of 1 GB CPU maximum. If the project grows and you work with a large number of WordPress themes and WordPress plugins, you will however need to provide additional performance for the CMS.
In terms of software, WordPress requires the following components for flawless operation:
- Scripting language: PHP 7.4 or higher
- Web server : Apache; NGINX
- Database : MySQL 5.7 or higher; MariaDB 10.3 or higher (see also “MariaDB vs. MySQL”)
Furthermore, the HTTPS support is required and can be activated at any time both in Apache (by module) and in NGINX (by parameter).
The simplest solution for installing the described software components is to set up a LAMP server.
Install WordPress on Ubuntu: tutorial
WordPress works on different versions of Ubuntu. So you can use an old edition of the Linux distribution or the current version. For our tutorial, we installed WordPress on Ubuntu 22.04. The server used is Apache and the MySQL database.
Step 1: Install dependencies
If you have not yet configured a LAMP server or installed the necessary software components, do so in this first step. To obtain the current versions of Apache, MySQL and PHPopen the terminal and run the following command:
sudo apt update
sudo apt install apache2 \
   ghostscript \
   libapache2-mod-php \
   mysql-server \
   php \
   php-bcmath \
   php-curl \
   php-imagick \
   php-intl \
   php-json \
   php-mbstring \
   php-mysql \
   php-xml \
   php-zip
bash
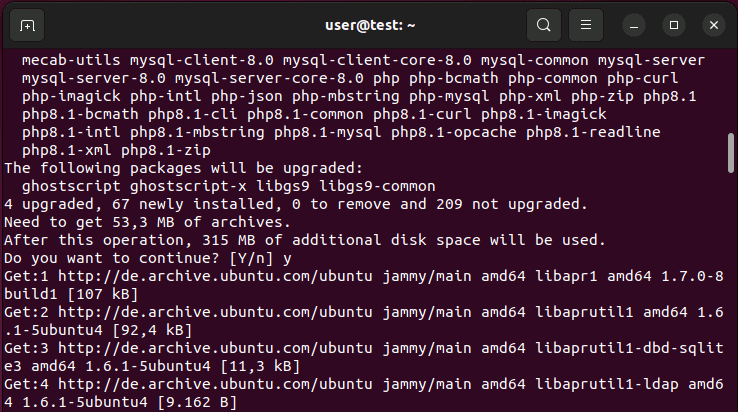
After a short check, you get an overview of the packages that need to be reinstalled or updated. Confirm the download (and the disk space required for installation) by typing “ J » and pressing the Enter key.
Step 2: Download WordPress Files
Once the basic structure is in place, you can start installing WordPress on your Ubuntu server. Ubuntu has standard package files that can be installed using the package manager. However, it is recommended to obtain the installation files directly from the official WordPress website, wordpress.org. This way you are sure to work with the current version of WordPress and to be able to call on WordPress support in case of problems.
With the following commands you first create a installation directory appropriate and then give access rights to the user profile “www-data” (standard user for web server operations). Finally, you download the current WordPress installation files:
sudo mkdir -p /srv/www
sudo chown www-data: /srv/www
curl https://wordpress.org/latest.tar.gz | sudo -u www-data tar zx -C /srv/www
bash
Do you want to save valuable time when installing and configuring your WordPress project? With hosting packages from IONOS, installing WordPress has never been easier: start the installation in the customer portal, enter your site title and access data and complete all other steps with the wizard installation.
Step 3: Configure Apache for WordPress
The next step is to configure the Apache web server so that WordPress can run on Ubuntu. To do this, first create a configuration file in the Apache directory under the name wordpress.conf :
sudo touch /etc/apache2/sites-available/wordpress.confbash
Then open the file with the following command:
sudo gedit /etc/apache2/sites-available/wordpress.confbash
Now copy the following lines into the file, then save everything:
<VirtualHost *:80>
   DocumentRoot /srv/www/wordpress
   <Directory /srv/www/wordpress>
      Options FollowSymLinks
      AllowOverride Limit Options FileInfo
      DirectoryIndex index.php
      Require all granted
   </Directory>
   <Directory /srv/www/wordpress/wp-content>
      Options FollowSymLinks
      Require all granted
   </Directory>
</VirtualHost>
bash
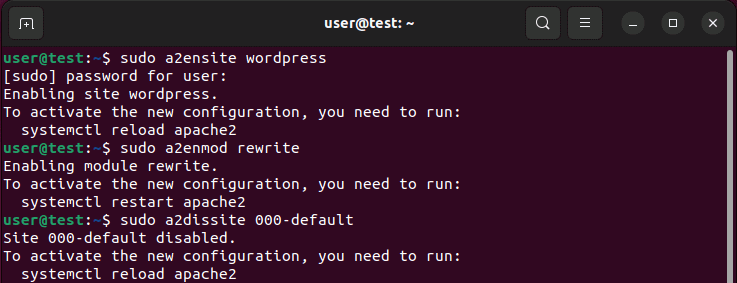
Now activate the page and the URL rewriting and deactivate the “It works!” page » which WordPress otherwise presents by default. To do this, execute the following three commands successively:
sudo a2ensite wordpress
sudo a2enmod rewrite
sudo a2dissite 000-default
bash
Finally, restart the Apache web server:
sudo service apache2 reloadbash
For the web server to make your WordPress project accessible via an individual address, you will need a domain name. At IONOS you can register your own domain name today and thus obtain the desired address.
Step 4: Create a MySQL Database
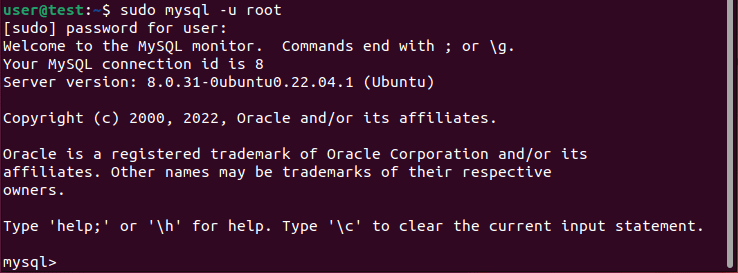
To be able to install WordPress on Ubuntu, you must create a first database for the project. To do this, first connect to the MySQL server with the root account:
Once the connection is successful, you will see the MySQL input line “ mysql> “.
In the next step, create a database named “wordpress” using the following command:
CREATE DATABASE wordpress;bash
It is also necessary to create a user profile for the database. Instead of “Password”, you can set your individual password with the following command:
CREATE USER wordpress@localhost IDENTIFIED BY ‘<*Mot de passe*>‘;bash
Now grant the user profile the database access rights :
GRANT SELECT,INSERT,UPDATE,DELETE,CREATE,DROP,ALTER
   -> ON wordpress.*
   -> TO wordpress@localhost;
bash
THE changes made to the database can be applied as follows, without restarting the MySQL service:
Finally, disconnect from the MySQL server:
Step 5: Connect WordPress to the Created Database
The new database should now be linked to WordPress. To do this, appropriate entries must be created in the configuration file wp-config.php. Since no configuration has been created so far, just use the example configuration you copy into wp-config.php using the following command:
sudo -u www-data cp /srv/www/wordpress/wp-config-sample.php /srv/www/wordpress/wp-config.phpbash
Transfer then the Name of the data base (wordpress), theuser created (wordpress) and password chosen (defined in step 4) in the configuration file:
sudo -u www-data sed -i ‘s/database_name_here/wordpress/’ /srv/www/wordpress/wp-config.php
sudo -u www-data sed -i ‘s/username_here/wordpress/’ /srv/www/wordpress/wp-config.php
sudo -u www-data sed -i ‘s/password_here/<*IhrPasswort*>/’ /srv/www/wordpress/wp-config.php
bash
Finally open the configuration file with the command:
sudo -u www-data nano /srv/www/wordpress/wp-config.phpbash
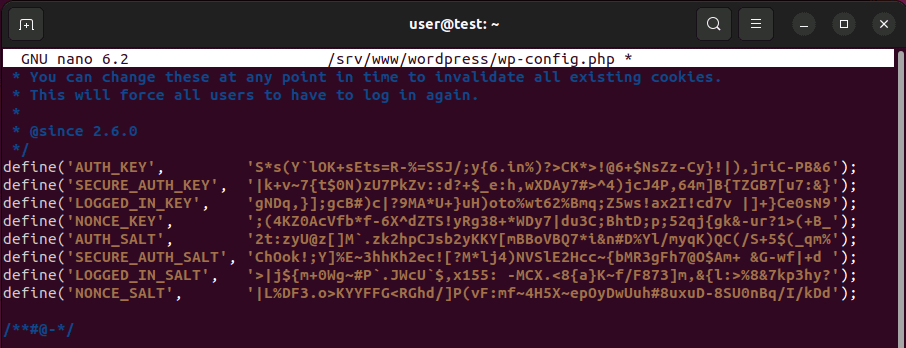
Verify that the information from the created database was transferred as desired, then delete the following lines from the file :
define( ‘AUTH_KEY’,         ‘put your unique phrase here’ );
define( ‘SECURE_AUTH_KEY’,  ‘put your unique phrase here’ );
define( ‘LOGGED_IN_KEY’,    ‘put your unique phrase here’ );
define( ‘NONCE_KEY’,        ‘put your unique phrase here’ );
define( ‘AUTH_SALT’,        ‘put your unique phrase here’ );
define( ‘SECURE_AUTH_SALT’, ‘put your unique phrase here’ );
define( ‘LOGGED_IN_SALT’,   ‘put your unique phrase here’ );
define( ‘NONCE_SALT’,       ‘put your unique phrase here’ );
bash
Access this wordpress.org page and copy the entries presented with randomly generated keys in place of the previously deleted lines. Save changes to the configuration file.
Step 6: Install and Configure WordPress on Ubuntu
Open your browser and type “ localhost “. The WordPress installation wizard will then appear automatically. Select the desired language and then indicate the Project title as well as the username and the password to connect to the WordPress backend. Additionally, the wizard requires a valid email address to complete the setup.
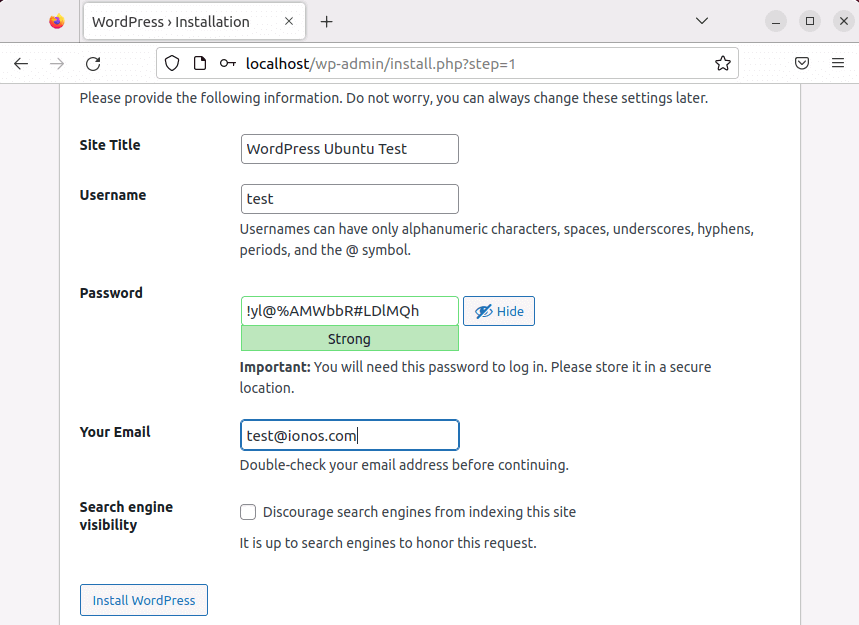
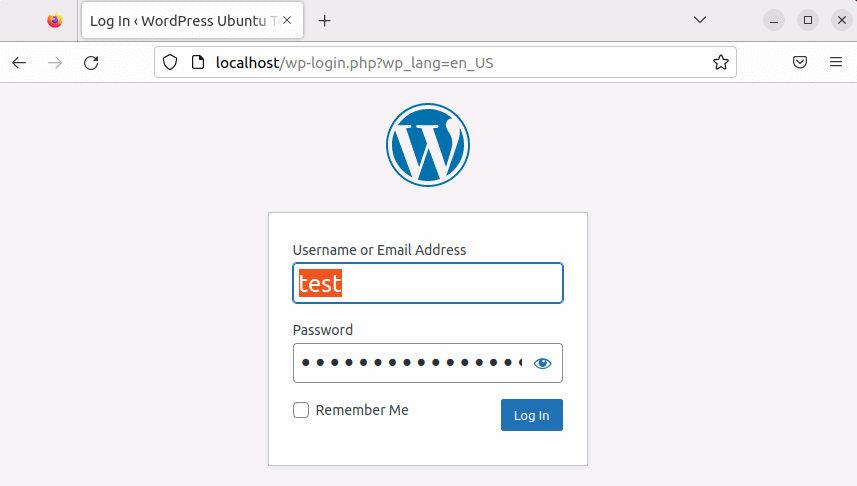
When you have filled in all the information, complete the configuration and installation of WordPress on Ubuntu by clicking on “ Install WordPress “. A confirmation message is then displayed and you can now call up the login screen for the backend in the browser at any time via the address localhost/wp-login.php. All you need to do is enter the username and password you set to log in to WordPress.
In summary: creating web projects with WordPress and Ubuntu
Installing WordPress on Ubuntu is within the reach of novices. Users with the appropriate hardware install the necessary software components as quickly as they download the content management system program files. Just the web server and database configuration may seem a bit unusual at first. Using the instructions above, you will easily install your WordPress project on your own Ubuntu server.
Have you installed WordPress on Ubuntu and now want to get started with the CMS? Also take a look at the following Digital Guide articles:


