phpMyAdmin is a tool designed to considerably facilitate database management. You can install phpMyAdmin on all major operating systems in just a few steps.
phpMyAdmin: what is it?
phpMyAdmin is an open source tool that makes database management easier for users. Generally, only the command line provides access to databases. phpMyAdmin however offers a visual interface which displays directly in the browser and helps website operators better interact with their MariaDB or MySQL databases. To use phpMyAdmin you do not need know SQL query language : for many features, such as creating tables, the procedure is simple and does not require knowledge of SQL commands.
Requirements for installing phpMyAdmin
To install phpMyAdmin on your web server, you must satisfy several requirements. These are not particularly strict, however; so nothing should stop you from using this web interface.
- Web server : To install phpMyAdmin you need a web server such as Apache or Nginx.
- PHP : as the name of the application suggests, you must also have a version of PHP. To install the latest phpMyAdmin update, any version from PHP 7.2.5 will do. PHP extensions, such as mbstring, can also help improve your performance.
- Database : phpMyAdmin supports databases compatible with MySQL (from version 5.5, whether for MySQL or for MariaDB).
- Web browser : Since phpMyAdmin is an application that runs in your web browser, you should also use your web browser of choice. Make sure that cookies and JavaScript are enabled there.
Installing phpMyAdmin on Windows
It is easier to install phpMyAdmin on Windows using third party software. Programs similar to XAMPP offer everything you need to be able to use phpMyAdmin and, at the same time, configure an Apache web server. Git or Docker also allow you to install phpMyAdmin on Windows without any problems. Discover with us an example of installing phpMyAdmin via XAMPP. To learn how to install phpMyAdmin using Git or Docker version control systems, see the official documentation of this web interface.
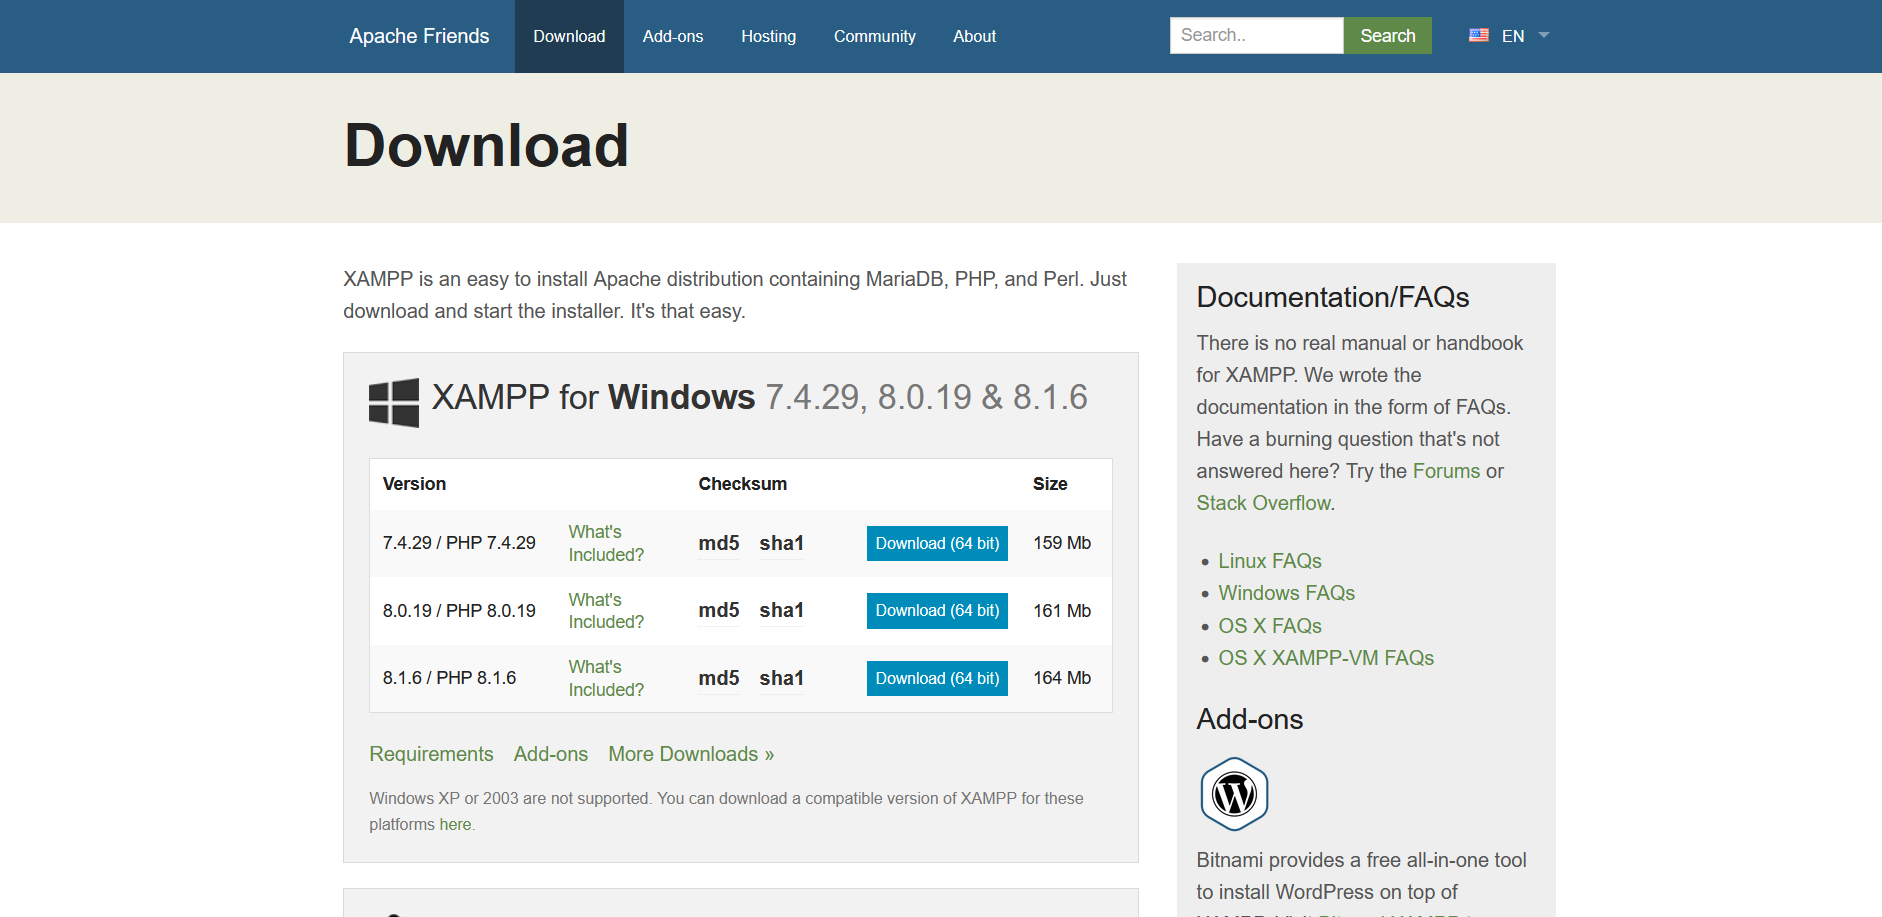
Step 1: Download and Install XAMPP
Start by installing the XAMPP program. You will easily find all the files you need to download on the official site of this open source distribution developed by Apache. Follow the instructions in the installation wizard or refer to our XAMPP tutorial to complete the installation on your system.
Step 2: Launch Web Server and Database in XAMPP
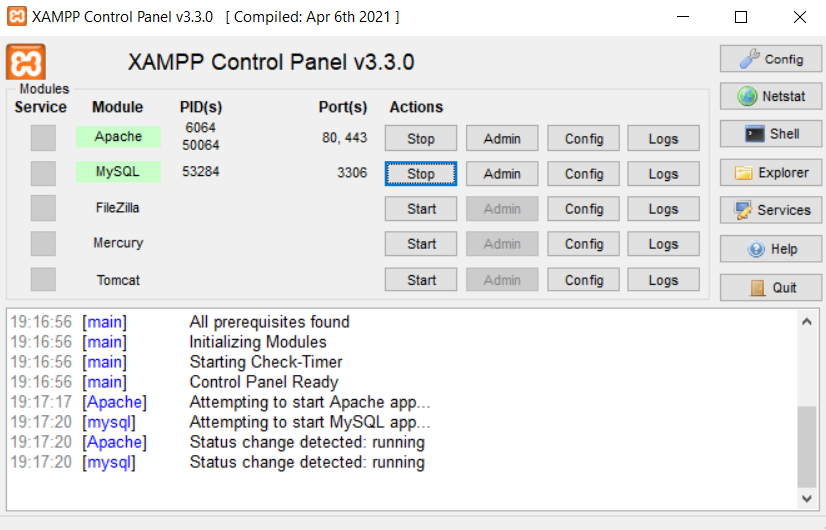
Once XAMPP is downloaded, you can launch the program. To use phpMyAdmin, you must launch both the Apache web server and the MySQL database in the XAMPP Control Panel using the “Start” button.
Step 3: Open the phpMyAdmin web interface
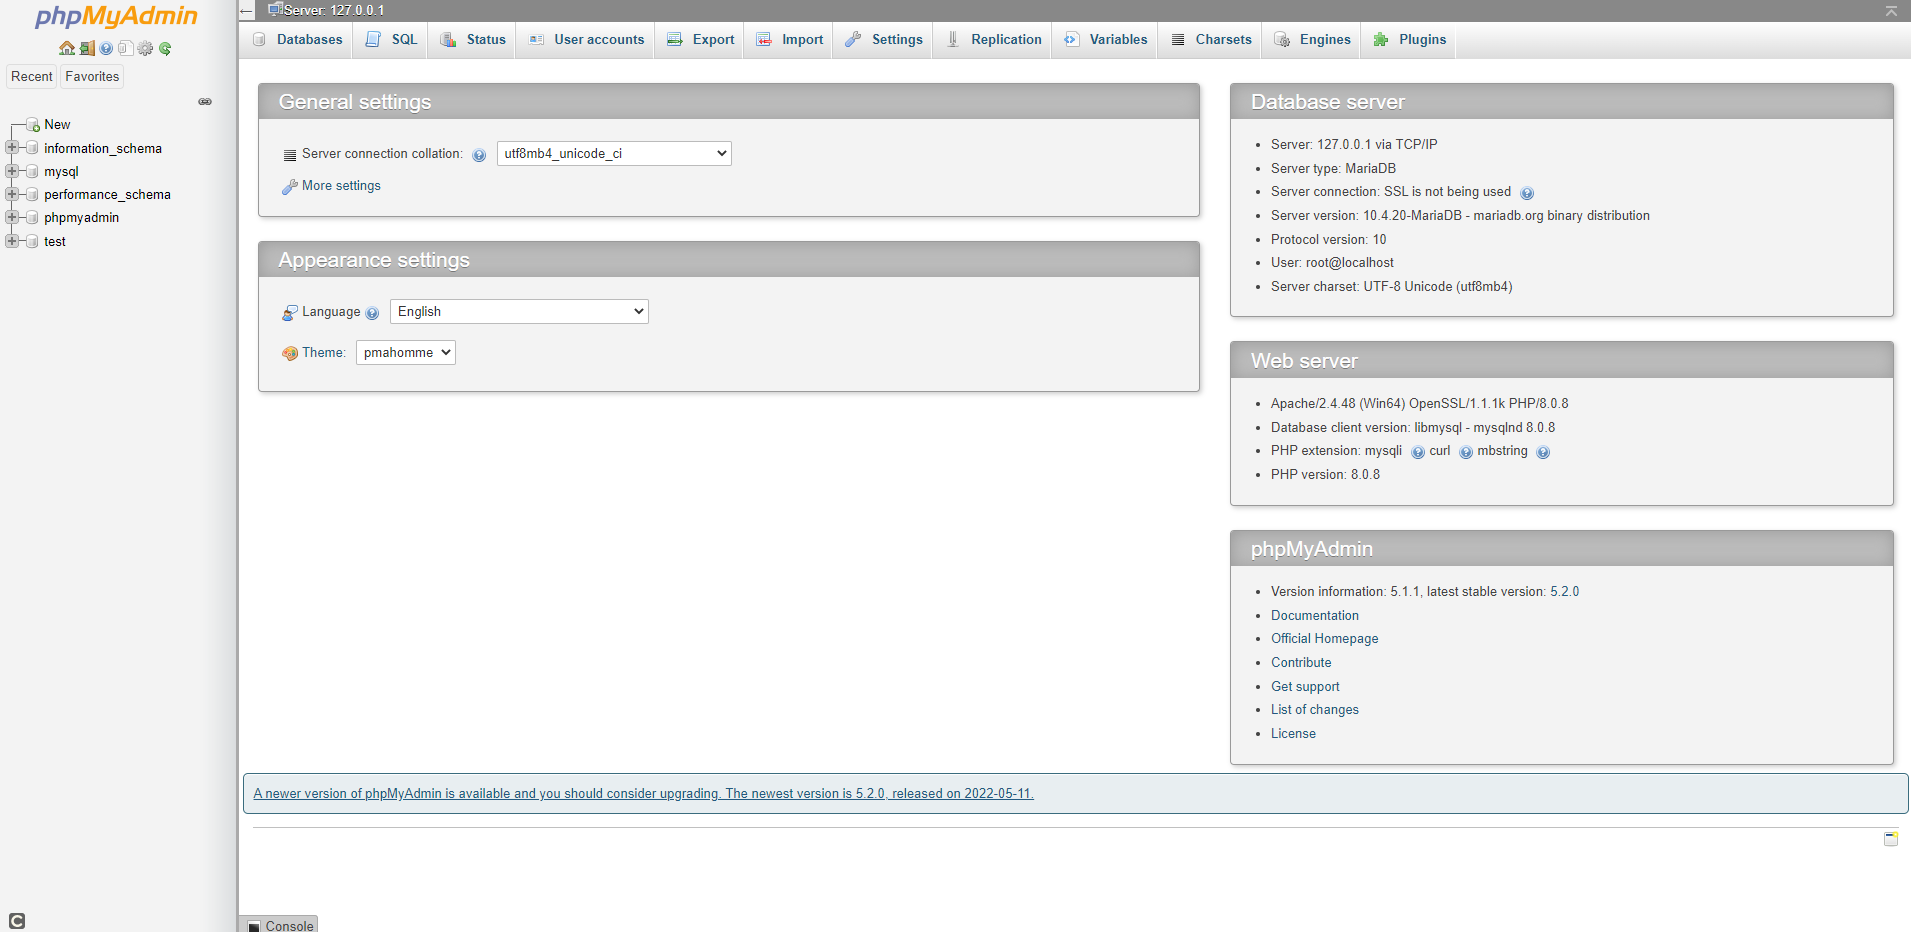
It’s very easy to open the phpMyAdmin web interface in your browser of choice. To do this, enter the address “http://localhost/phpmyadmin” in your browser’s search bar. You are then automatically redirected to the phpMyAdmin home page. You can then modify your settings and create or manage your own databases.
Installing phpMyAdmin on macOS
You can also install phpMyAdmin and use it on macOS using XAMPP. Here, the procedure to follow is similar to the method used on Windows, but be sure to select the macOS version when downloading XAMPP. This is not the case on Windows, but Apache and PHP are already installed on macOS ; thus, the manual installation of phpMyAdmin takes just a few steps.
Step 1: Install and Launch MySQL
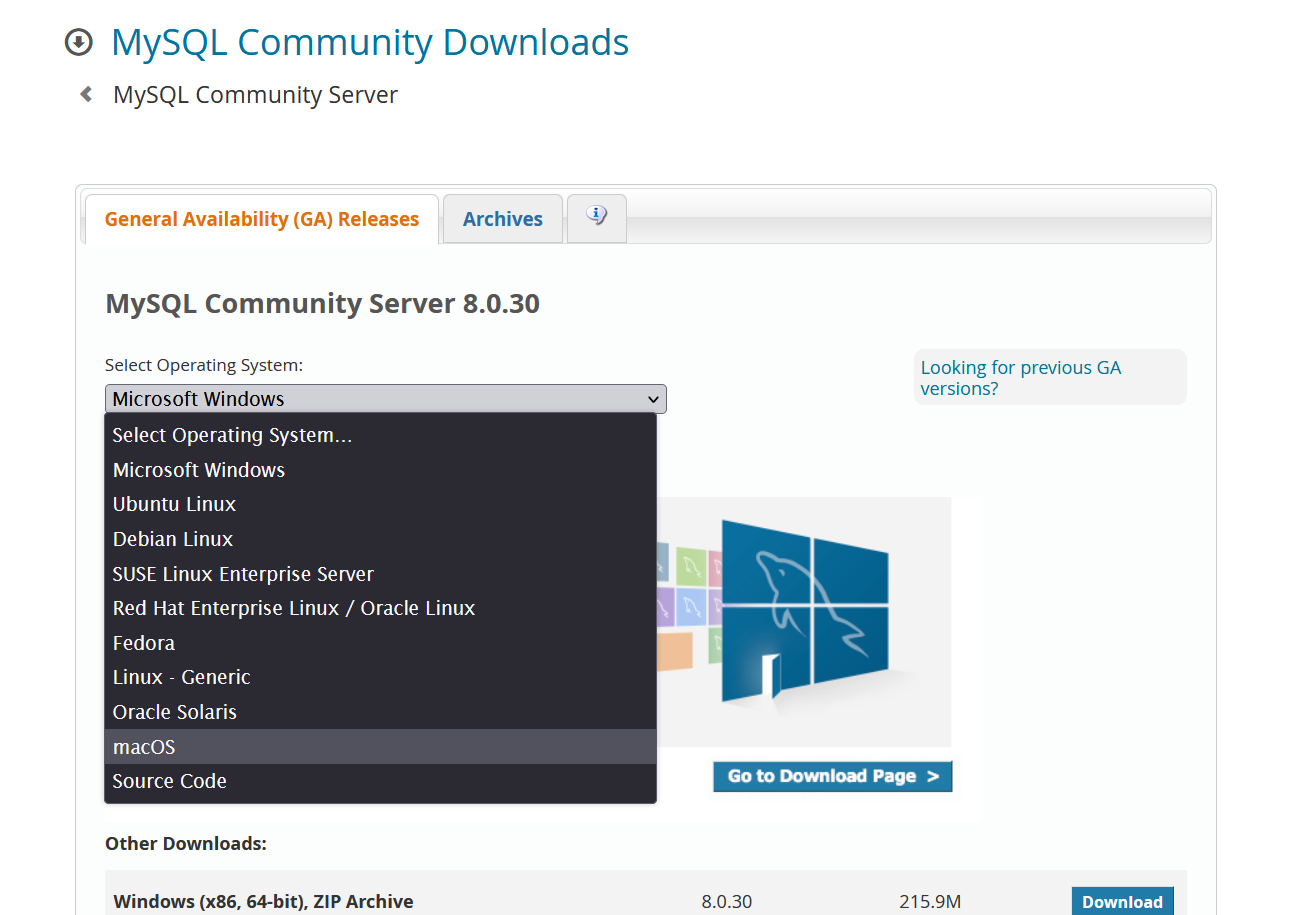
To use phpMyAdmin on macOS, you only need a appropriate database. It is possible to obtain one quickly: You can download all the necessary files on the MySQL system official website. Make sure you choose wisely macOS as an operating system. Follow the instructions in the installation wizard to finalize the installation. You should now be able to launch the MySQL server in the application configuration window.
Step 2: Launch Apache Web Server
Since Apache is already installed on macOS, you just need to launch the web server. To do this, start by opening the terminal. Then enter the following in the command line:
Step 3: Install phpMyAdmin and Open the Web Interface
To download the latest version of phpMyAdmin, go to the official site. Once the necessary files are downloaded, start by unzip the folder thus obtained. Move it in /Library/WebServer/Documents in order to add phpMyAdmin to your web server. As in Windows, now enter the address “http://localhost/phpmyadmin” in your browser’s search bar and navigate to the phpMyAdmin home page.
Install phpMyAdmin on Linux
The strategy to adopt to install the phpMyAdmin web interface on Linux depends above all on the Linux distribution you are using. To install phpMyAdmin under CentOS 7, the steps to follow therefore differ from the procedure to follow for an installation under Ubuntu. Discover with us examples of installation under Ubuntu and Debian.
Ubuntu
Step 1: Install a LAMP Battery
Ubuntu is considered one of the most accessible Linux distributions for beginners, and for good reason: as a general rule, phpMyAdmin is immediately operational upon installation a suitable web server and database. So you just need to install the LAMP server in Ubuntu, because it already has all the elements you need. Start by installing Ubuntu’s Tasksel tool, then the LAMP stack, by typing the following in the command line:
sudo apt-get install tasksel
sudo tasksel install lamp-server
Step 2: Install phpMyAdmin
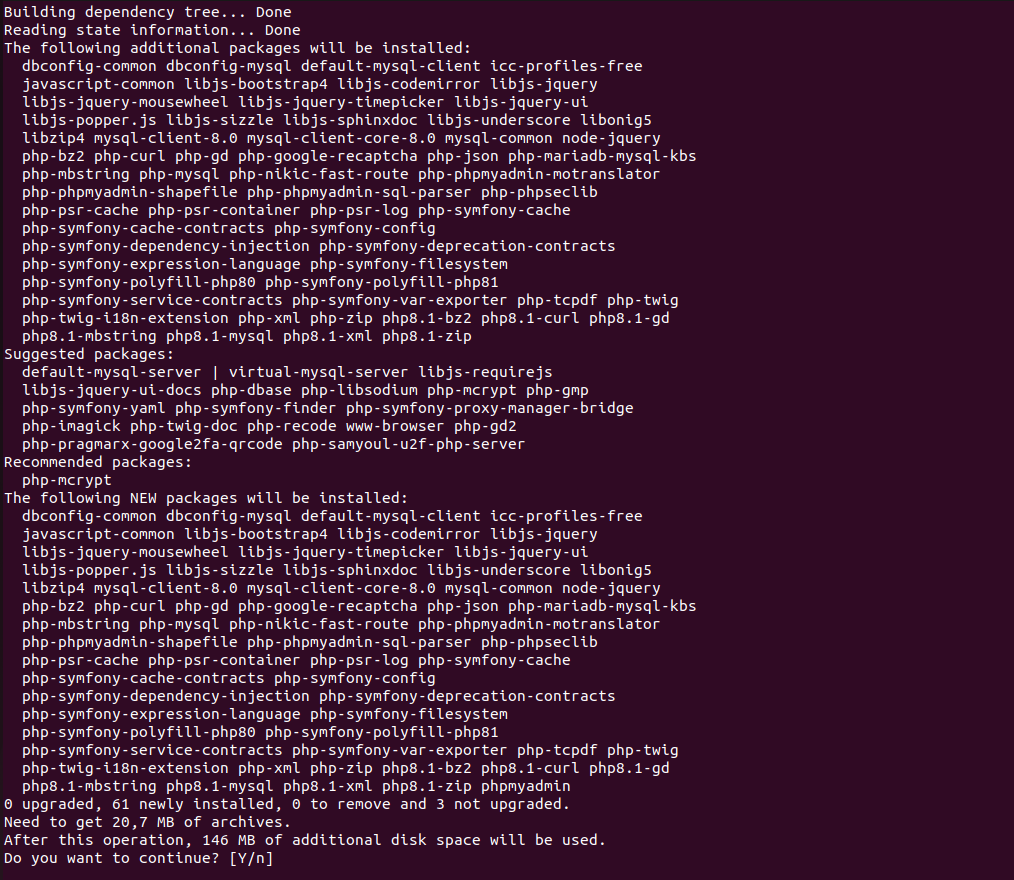
To install phpMyAdmin, again, nothing could be easier. Just use the following command in your terminal:
sudo apt install phpmyadminOnce this command is executed, the terminal asks you to confirm the installation of phpMyAdmin again. To do this, press the key [Y] (“Yes”). The installation then begins: you can call phpMyAdmin in the browser of your choice.
Debian
Step 1: Install a web server and database
If your version of Debian does not already offer a recent web server, database and PHP version, you shouldmanually install these items to work with phpMyAdmin. You can enter the following commands in the terminal for this purpose:
sudo apt install apache2
sudo apt install mariadb-server
sudo apt install php php-mysql libapache2-mod-php
Step 2: Install phpMyAdmin
The command to install phpMyAdmin is identical to the one used in Ubuntu:
sudo apt install phpmyadminThe installation of the web interface is now complete. You can interact with phpMyAdmin using the browser of your choice.


