The Composer dependency manager greatly simplifies working with the PHP scripting language. Once the tool is installed, you can easily access a large number of PHP packages, including libraries, and even integrate your own packages. Learn how Composer installation works on Windows 11.
How to install Composer on Windows 11?
To begin the installation process, the easiest way is to go through the Composer Windows installation file. You can download it freely and then run it. The different steps are summarized below.
The prerequisite for installing and using Composer is that a version of PHP is configured on the system. Read our dedicated article on the subject to learn how to install PHP.
Step 1: Download Composer installation file
Meet in the Composer official website download area. Click the “Composer-Setup.exe” link to download the Composer Windows setup file.
Step 2: start Composer installation
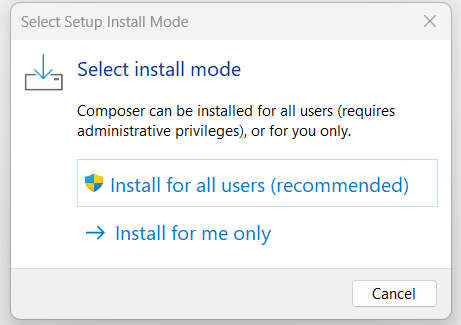
Navigate to your download directory and run the downloaded file by double clicking on it. Then select the recommended option « Install for all users », so that all users of the device can subsequently access the manager.
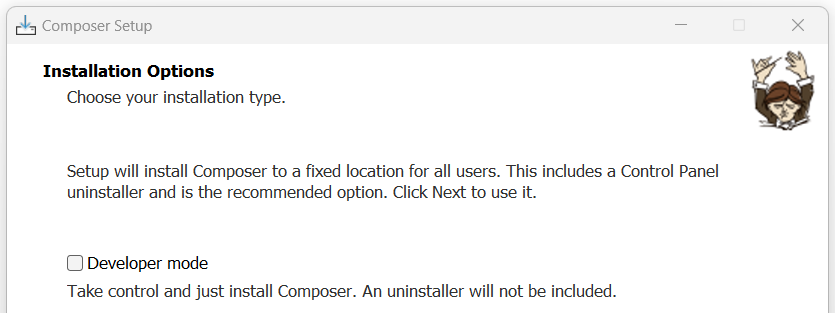
In the next window, you can enable developer mode by checking the corresponding box. In this case, the Windows installation wizard automatically determines the path to your PHP installation. If you have installed several editions of PHP, however, you cannot choose which version of PHP will be used.
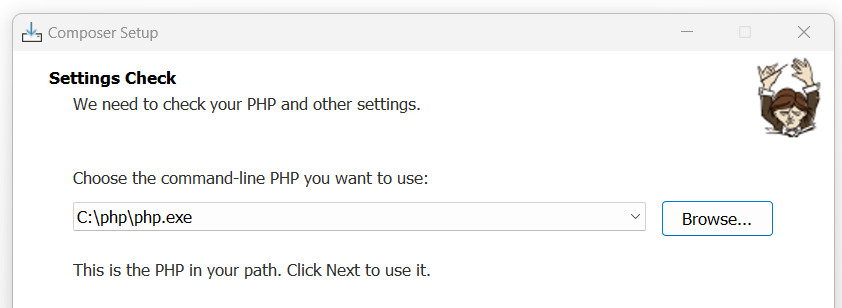
If you have not activated the developer mode, then indicate the path of the php.exe of the desired version of PHP.
Skip the proxy settings and then press « Install » to start the installation.
Step 3: complete the installation
After the handler is installed, you receive a message telling you that you need to relaunch a new command line instance in order to use Composer. This is explained by the fact that the system environment has changed. Click on “Next”, then “Finish” to complete the installation.
In some cases, it may be necessary to completely restart Windows 11 for the installation of Composer to be taken into account by the system.
Step 4: Test Composer installation via Windows 11 Command Prompt
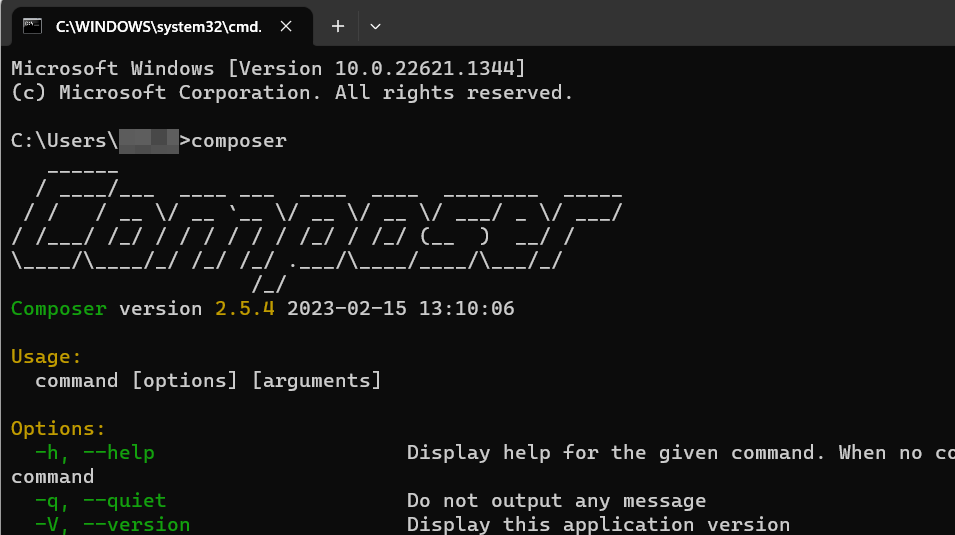
The last step of the installation consists in verifying that the configuration of the dependency manager has been carried out correctly. To do this, open the command prompt by pressing the keys [Windows] + [R] and run the command » cmd « . In the command prompt window, type the command » compose and confirm by pressing the Enter key. You immediately get the version of Composer installed and an overview of the available commands.
You can also access Composer with the IONOS web hosting package. Choose the solution that suits your needs and benefit from many additional advantages.]]
Using Composer on Windows 11: example
After installing Composer for Windows, you can use the dependency manager at any time to obtain public PHP packages. We explain below how to do it, taking the example of the package “ cocur/slugify ”, using which it is possible to convert strings into slugs.
Step 1: Install Git and add it to PATH
In order to download the « cocur/slugify » package, the Git version control system must be installed on your system and added to the PATH system variable. Windows 11 uses this variable to determine which files are needed to run a command line program. If you haven’t installed Git yet, now is the time to do so: you will find all the information you need to install and use the tool in our Git tutorial.
To add the version control tool to the PATH variable, follow these steps:
- Run Windows Search and search for “ Modify system environment variables « .
- Click on the corresponding search result.
- In the « Advanced system settings » tab that opens, select » Environment variables « .
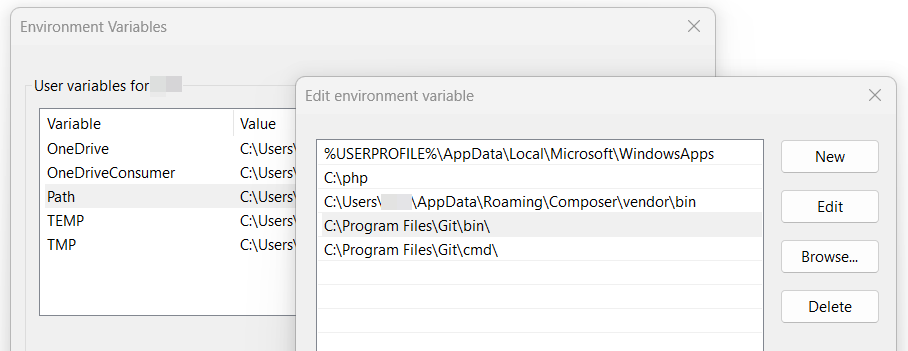
- In the upper part « User variables », press the entry » Path and then press « Edit ».
- Click on the “New” button and insert the value “C:\Program Files\Git\bin\”.
- Repeat the same for the « C:\Program Files\Git\cmd\ » value.
- Save changes by clicking » OK « .
Step 2: Create a directory for the Composer package
The next step is to create a directory for the PHP package you want to get using Composer. Launch the command prompt using the key combination [Windows] + [R] and the command » cmd « . Our goal here is to create the Slugify directory directly in C:, so we go to this main directory first:
Then, the directory with the name “slugify” is created by entering the following:
Step 3: Install the package using Composer
Change to the directory created by running the following command:
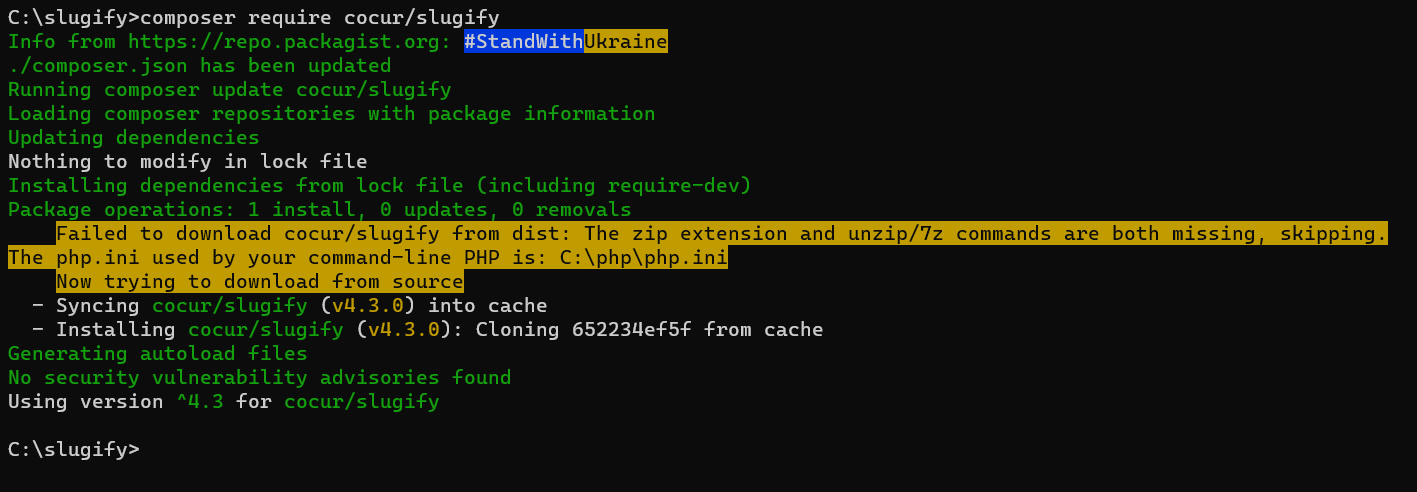
Once in the directory, install Slugify using Composer with the following command:
composer require cocur/slugifybash
Step 4: Create a test PHP script
In the slugify directory you created, you should now find the two files composer.lock And composer.json as well as the folder named “vendor”. In the latter, there is the file autoload.phpwhich you must integrate into your PHP script in order to have access to the services of the cocur/slugify package.
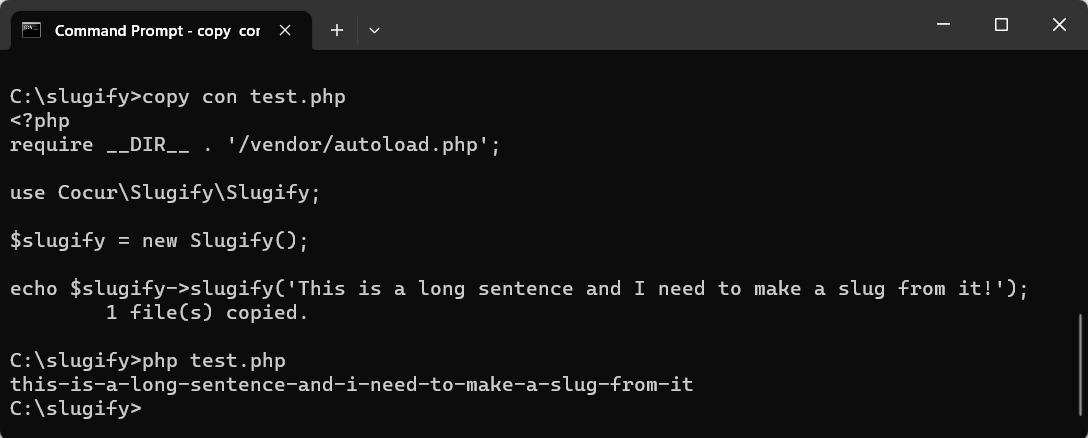
To create a simple test script, create a file named test.php in the main slugify directory by typing the following command at the command prompt:
Then, insert the PHP code allowing to integrate the file autoload.php :
<?php
require __DIR__ . '/vendor/autoload.php';

use Cocur\Slugify\Slugify;

$slugify = new Slugify();

echo $slugify->slugify('This is a long sentence and i need to make a slug from it!');
bash
Save the file with the key combination [Ctrl] + [C] and run the script with the following command:
The string slug is then displayed:
this-is-a-long-sentence-and-i-need-to-make-a-slug-from-itbash
In the Digital Guide, you will find articles on installing Composer on other operating systems:


