Instead of the secondary address mask under sites.google.com, you can publish your Google Sites web project with your domain name. Enough to give it an air more professional and personalized. What are the conditions to be met? And how is the link established between your Google Sites and your domain name?
Register your domain name for Google Sites
Before you can associate your Google Sites with a custom domain name, you must first have your own domain name. You can acquire it from a domain name registrar like IONOS. But before that, you must first think about its name and the top-level domain (ie domain extension) you want: the more the URL corresponds to your Google site, the better it will represent your project.
Example of domain registration at IONOS
At IONOS you can reserve your own domain name for your Google Sites site in a few steps. Simply go to the IONOS home page, select the “Domains” product line and then click on “ Domain names “.
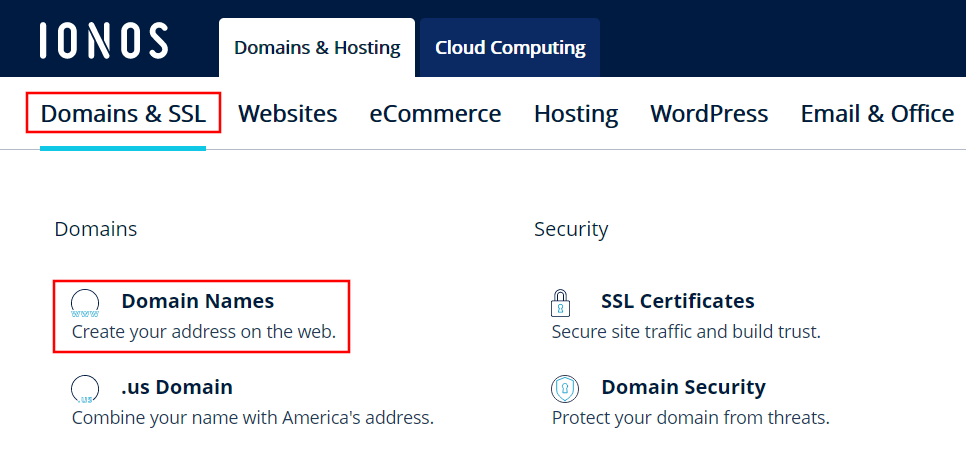
Using the Domain Checker, then check if the combination of domain name and domain extension you want is available. To do this, enter the desired address and click on the “Search” button.
If the domain you want is available, the corresponding message is displayed. By clicking on the button “ Add “, you can start the registration process. Otherwise, use the Domain Checker again to search for an alternative.

In the next two shopping cart dialogs you can optional add other addresses to the chosen domain or add an additional IONOS product to the domain, such as Domain Protection. You can also simply register the desired web address without taking any additional offers.
Create an IONOS customer account or pay directly for the domain name via PayPal to complete the registration of your own domain name for your Google Sites site.
Want to get started with your own Google Site domain today? So take advantage of the opportunity and register your personalized domain name with IONOS. Includes Wildcard SSL certificate, Domain Lock and your own electronic mailbox!
Associate Google Sites and your own domain name: step-by-step instructions
Once you have registered your domain name for your Google site, you can access the Google Sites service to start the procedure. Sign in with your Google account and follow the instructions below to set up the new web address.
Step 1: Initiate the switch to a vanity URL
Once connected to the Google Sites service, select the Google site to associate with the domain name. Display it scrolling menu next to the “Publish” button and select the option “ Post Settings… “.
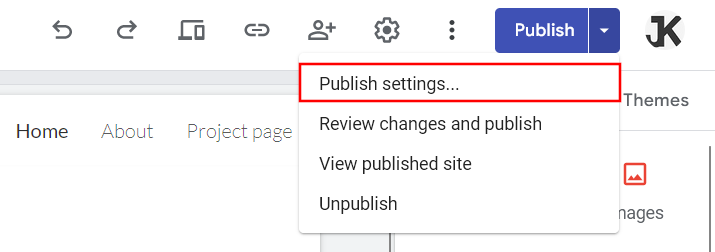
Under “Custom Domain,” click the “ Manage » then on “ Configure “.
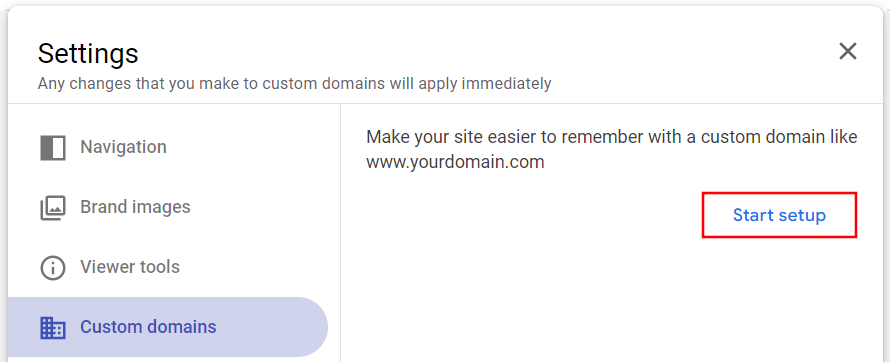
Step 2: Verify the domain name
Once the configuration is started, you have the choice between two options:
- Use a third-party domain : have you already registered your domain name with the provider of your choice? So choose this option;
- Buy a domain : If you haven’t yet purchased a domain name for your Google site, you can do so now and purchase a web address from Google Domains.
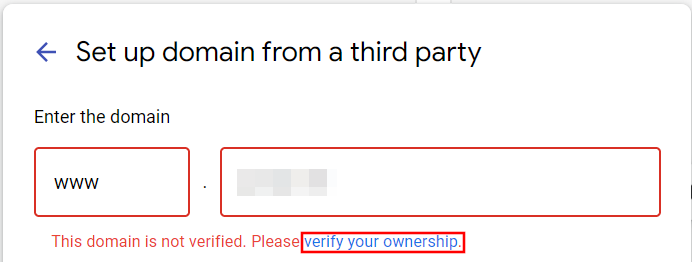
Since we already have the domain name, simply choose this option and enter the domain name in the dialog box that follows. The system displays a notification that the domain is not yet validated. Then press the link that appears “ Please validate it “.
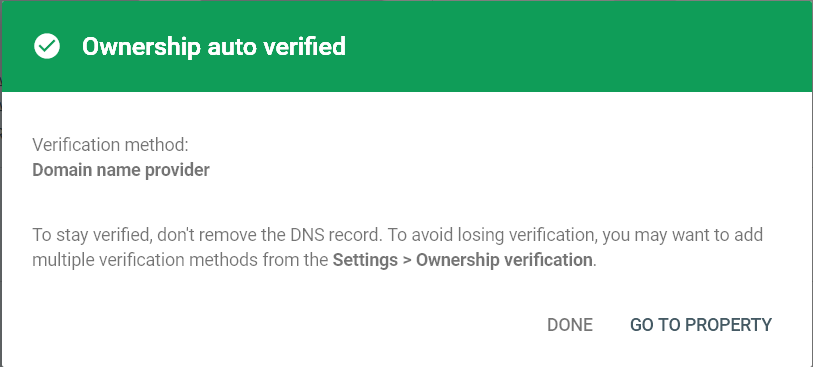
A new tab opens with an automatic redirection to Google Search Console. Keep the property type “Domain” and click “Continue”. Google determines from which registrar you purchased your domain name for Google Sites and automatically redirects you to the respective provider’s page after clicking ” Start validation “.
Then log in with your credentials and click on “ Connect “.
Finally, give access to Google via “ Accept “. A brief screening process follows to verify your status as owner. After successful verification, you will receive a corresponding notification.
Step 3: Link Google Sites to your domain name
Back in Google Sites, the custom domain name is now configurable. The notification regarding the pending confirmation is no longer displayed, instead the button “ Following “.
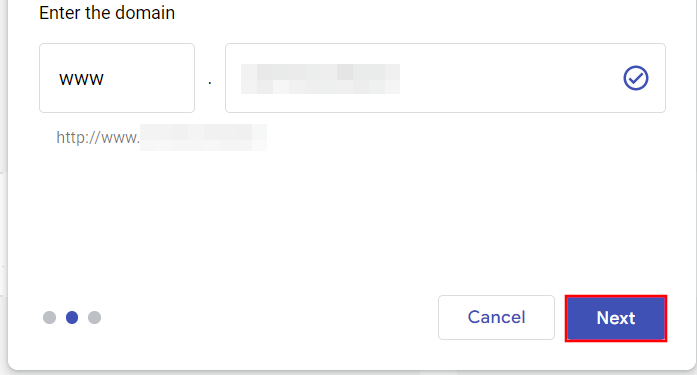
Note that you must indicate your domain here in the version with www. A configuration without wwwnot possible. If you want to use your domain without www, you need to set up a redirect for this version. To do this, follow step 4 below.
A new dialog window appears with final instructions for setting up the Google Site domain name. Leave the window open during the following steps:
- Open a new tab in your browser to navigate to the site of the provider you registered the domain with. For example, here we open the IONOS Cloud Panel login page to connect us;
- Go to the DNS settings for the registered domain. In the IONOS customer area, select the “ Domains & SSL », click on the desired domain and go to the “ DNS » ;
- Create a new CNAME record (“Add Record”);
- Register
wwwas CNAME value (“Hostname”); - As the CNAME (“Point to”) destination, choose
ghs.googlehosted.com.– without forgetting the final point; - Save your entry.
Return to the tab from which you accessed Google Sites and click “ Save » in the still open dialog box. After a brief setup process, your Google Sites site and the custom domain name are linked and you can access your site through the custom web address. However, it may take up to 48 hours for your site to be accessible under your new domain.
Step 4: Set up an HTTP redirect (if necessary)
Once you have associated your website with your domain, it is only viewable under the version containing the subdomain www. This means that the website is for example available under the URL https://www.siteweb.frbut not under https://siteweb.fr. This problem can be quickly resolved by HTTP transfer. On IONOS, you can configure it very easily via the Cloud Panel:
- Log in again on IONOS in your customer account.
- Go to the “Domains & SSL” page > [votre domaine] and select the “Details” tab.
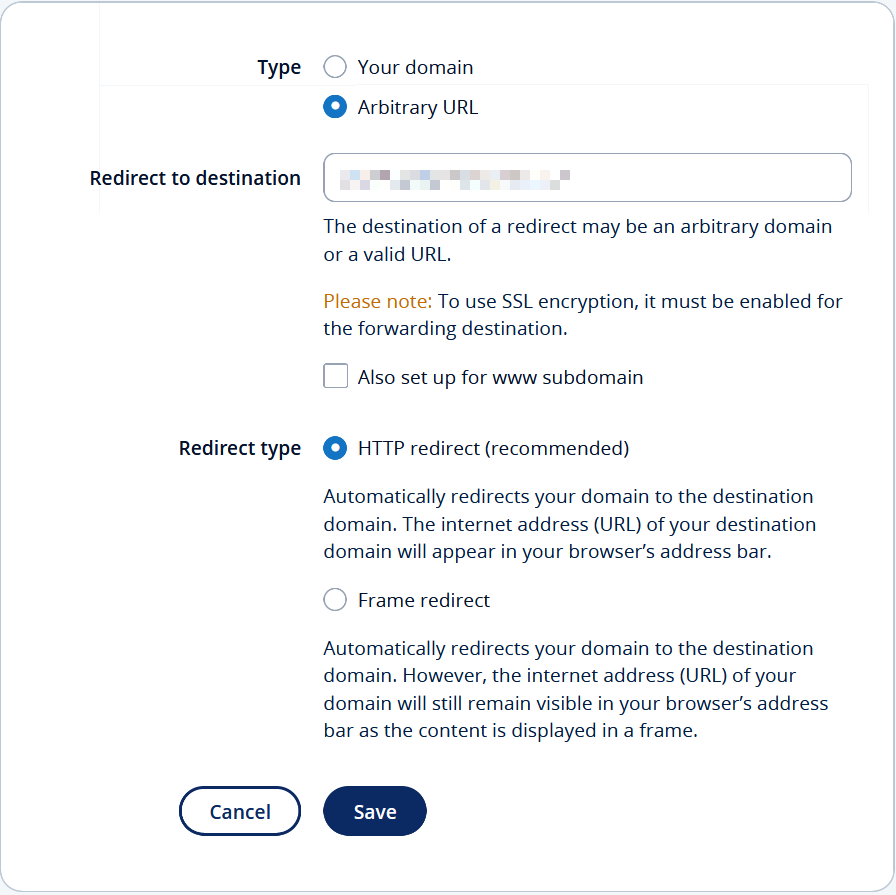
- In the “Usage Type” category, click “Customize Usage Type.” On the next page, select the “Domain Redirection” option.
- Under “Type,” select the “Any URL” option and provide your domain with
wwwas a redirect destination. So, if your domain isexemple.frenter herewww.exemple.fr. - Click “http Redirect” under “Redirect Type” and save your changes. Your website should be accessible within a few minutes at the address without
www.
www. Your domain registrar doesn’t have a web console where you can configure HTTP redirection with just a few clicks? Our article on 301-Redirects tells you how to fix this problem.


