Since Windows 10, Windows has offered its own SSH client and built-in SSH tools. These allow you to connect to SSH servers without third-party software and even operate your own SSH server with Windows 10.
Quick Guide: Enable Windows 10 SSH Client
Activate the client:
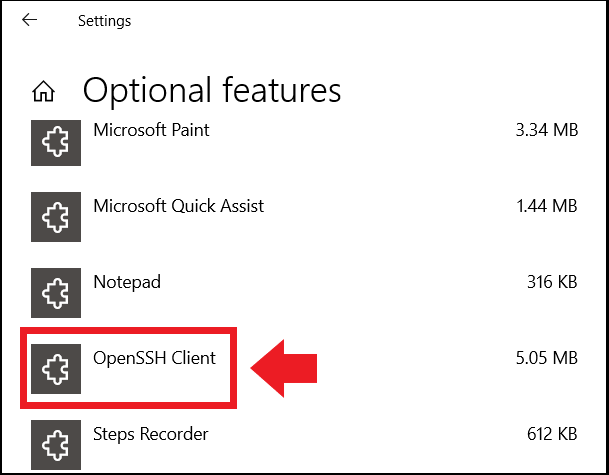
- Go to “Settings > Apps > Apps & features > Optional features” and check if the OpenSSH client is installed. If not, install it via “Add an optional feature”.
- Open Command Prompt as administrator: search for « cmd.exe » in Windows Search, then select « run as administrator. »
- Then enter the CMD command
ssh. - Establish the connection to the desired server with
ssh exemplenom@serveur. - Verify that the port used is 22.
- When connecting for the first time, confirm the host key thumbprint by clicking “Yes” and then enter the password.
Set up an SSH server under Windows 10:
- Open “Settings > Apps > Apps & features > Optional features”.
- Select “Add optional feature”, “OpenSSH Server”, then “Next” and finally “Install”. Administrator rights are required here.
- In the Windows « Services » application, set the startup type for « OpenSSH Authentication Agent » and « OpenSSH Server » to « Automatic ».
- Check firewall rules in Windows Run dialog box with
Get-NetFirewallRule -Nom *SSH*. - Connect to the SSH server by typing “ssh
« .
What is Windows 10 SSH client (Secure Shell)?
The primary function of Secure Shell (SSH) is to establish a secure network connection between computers or servers. This is made possible by Windows SSH tools via CMD commands and a remote desktop connection. SSH therefore allows a connection without having to be directly on the computer on the network in question. As with Ubuntu SSH, no third-party software is needed and connections are secure and encrypted with SCP and SFTP.
Therefore, many users use the SSH client-server connection to perform tasks remotely. A connection between Linux and Windows computers, remote computer control as well as encrypted data transfer are also possible.
Remote access is secure, which is guaranteed by the following security elements:
- Client-server authentication
- Encrypted data transmission
- Data integrity
If you want to use SSH on Windows 11, discover the process in our dedicated article.
How to use Windows 10 SSH client?
To use Windows SSH Remote Access, these conditions must be met:
- Windows 2019 or Windows 10 (version 1809) at least
- At least PowerShell 5.1
- Administrator rights
Follow these steps to use the Windows 10 OpenSSH client:
Step 1 : check via “ Settings > Apps > Apps & features > Optional features » if the OpenSSH client is already installed. If not, go to « Add Feature », type « OpenSSH Client », then click « Install ».

2nd step : Once the client is installed, open thecommand prompt as administrator. To do this, enter “cmd.exe” in Windows Search, then select “Run as administrator”.
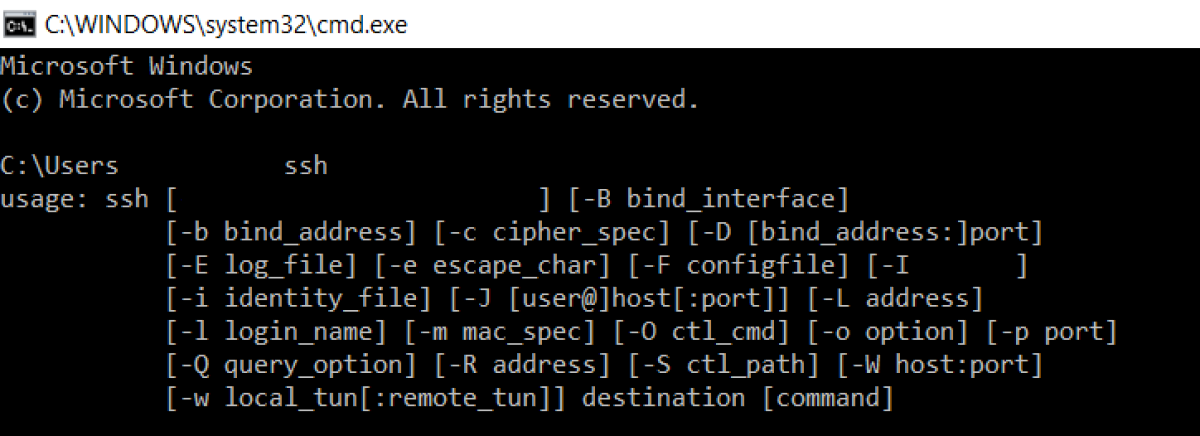
Step 3: To open the SSH tool in Windows 10, enter the CMD command next :
A SSH user guide opens: you can see the syntax of the commands and all the parameters of the SSH client.

Step 4: If you want to access a Raspberry Pi, proceed the same way as in macOS and Linux. Establish the remote connection to the server of the targeted Raspberry device using the following command:
In the address, “Pi” represents the user name of the server and “raspberrypi” the remote server being addressed. If this is an IP address on the network or an external remote server, use this command syntax:
ssh nom@monsiteweb.mondomaine.frCMD
Step 5: the SSH client uses the port 22 by default. If the server you are talking to uses another port, for example port 7200, you will need to specify the port to establish the connection:
ssh pi@raspberrypi -p 7200CMD
Step 6: If you are connecting to the server for the first time, confirm thehost key fingerprint by typing “Yes”. Then enter the user password to be able to control the remote computer via SSH and use commands in the terminal.
How to set up an SSH server with Windows 10?
Accessing a remote server via SSH isn’t enough for you, so you want to set up your own SSH server with Windows 10? In this case, first install an OpenSSH server. Installation can be done quickly on Windows.
Proceed as follows:
Step 1 : follow the path “ Settings > Apps > Apps & features > Optional features « .
2nd step : go to » Add an optional feature » and click “OpenSSH Server” in the list, then click “Next and “Install”. This step can only be performed with administrator rights.

Step 3: for the SSH server, Windows installs the “OpenSSH Authentication Agent” and “OpenSSH Server” services. If you want to use SSH regularly, change the services startup type to “Automatic”. To do this, enter “Services” in Windows Search and launch the application. Right-click on the corresponding services and go to “Properties”. Now change the startup type to “Automatic”.
Step 4: Finally, check that the SSH firewall rules have been activated. To do this, enter the following command in the Run dialog box and verify the firewall configuration:
Get-NetFirewallRule -Nom *SSH*CMD
Step 5: To now connect to the SSH server, type the following command:


