You can change the date format in Google Sheets, have dates autocomplete, and sort rows later based on dates. This saves you many repetitive tasks, and you obtain a significantly clearer document.
Why is it recommended to use a uniform Google Sheets date format?
In some programs used to create tables, the date indication is not resolved optimally. Self-correction or imprecise formatting may cause the created document to appear inconsistent and, at worst, difficult to read. There are also many different date formats, which may vary depending on language or usage. However, once you understand how to use dates in your spreadsheet, you will save a lot of time and end up with neater documents. Everything you need to know about using date in Google Sheets is explained below.
The DATE function in Google Sheets
Just like its competitor Microsoft Excel with its date function, Google Sheets has a DATE formula. This is used to automatically convert an entry containing the year, month and day into a date. Here is the syntax for this function:
DATE(année;mois;jour)
There are a few factors to consider when using this feature. So the date can only be displayed if all entries are numbers : so don't forget to change them in our example. If a character string is entered, Google Sheets displays an error message. On the other hand, if you enter incorrect values (e.g. a monthly value greater than 12 or a daily value greater than 31), the edition is automatically recalculated and excess values are added. Thus, the entry DATE(2024;1;33) becomes for example 02/02/2024, because the month of January can only have 31 days. Function shortens decimal values and displays an error message for values greater than 10000 and less than 0.
You can find an overview of the most important keyboard shortcuts for Google Sheets in our Digital Guide.
Microsoft 365 for businesses with IONOS!
The latest version of your favorite Office apps on all devices.
Free installation assistance!
Exchange up to 50 GB
OneDrive with 1TB
24/7 support
Insert date in Google Sheets
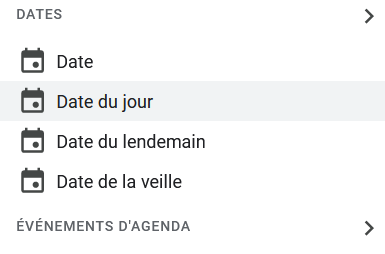
Another quick method if you want to insert the date in Google Sheets is to use the key [@]. To do this, proceed as follows:
- Click on the cell in which you want to insert the date.
- Then press the button [@].
- Next to files or other contacts, you will find the “DATES” option.
- You now have several options. If you click on “Date”, the calendar opens and you can choose a date of your choice. You can also choose « Today's Date », « Tomorrow's Date » or « Yesterday's Date » and Google Sheets inserts the date automatically.
Google Sheets: format the date
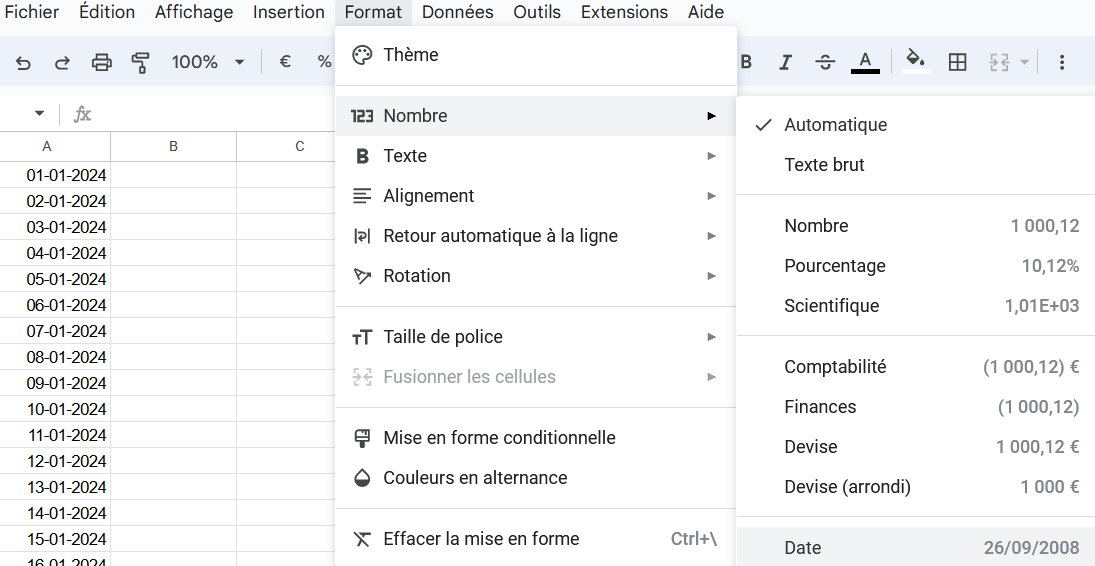
When you open a new table document, you can insert a date in any format you want, such as « 01/01/2024 », « 1/1/2024 », « 01/01/2024 » or « 1-1 -2024”. By default, the program simply takes these entries without modifying them, which can cause the document to be inconsistent. If you want to format numeric values, you can do so in the following way:
- First click again on the cell you want to edit or select multiple cells.
- On the top tab, you will find the “Format” option. Select it.
- In second position, you will find the “Number” option. Click on this option.
If you select the “Date” option, all selected numeric values will be converted to the standard “day/month/year” format.
However, you also have the option of defining the format yourself. To do this, proceed as follows:
- Select the affected cell(s) again.
- Click “Format” again, then “Number”.
- At the penultimate position, you will find the “Custom date and time” option. Select this option.
- A list of different date and time formats opens. You can, among other things, insert the day of the week, write the name of the month in full or display numerical values less than 10 with a single digit. Select the appropriate format and then click “Apply”. The selected date data is then converted to this format.
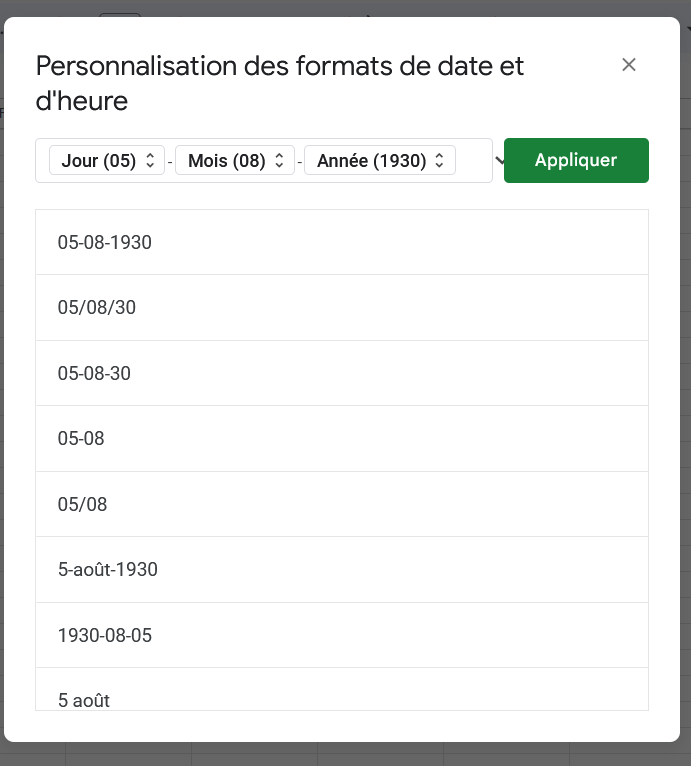
You can also adapt your preferred format according to your wishes. To do this, first select the corresponding format and then use the arrows located behind the different elements. On Google Sheets, writing the month or day of the week in full or displaying only two numbers for the year is entirely possible. For example, if you want to use points instead of crossbars between different elements, you just need to configure it. If the settings suit you, confirm again by clicking “Apply”.
Nextcloud Managed Hosting
With Managed Nextcloud, benefit from your own smart cloud storage for teamwork: domain name and tools included.
Respects the GDPR
24/7 support
Data center in EU
Google Sheets: format the date continuously
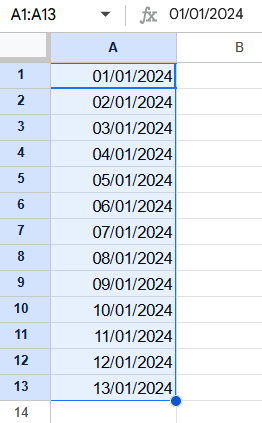
If the date is to be presented continuously in a Google Table, there is no need to enter each day individually. Just follow the following steps:
- Click on the cell where you want to start your list.
- Enter the first date by hand in the format of your choice
- Move the mouse cursor to the lower right corner of the cell. A small plus sign appears. Click on it, hold down the mouse pointer and drag the cursor down.
- Release the mouse pointer. The program will now automatically complete the different days to the location you have chosen.
Sort Google tables by date
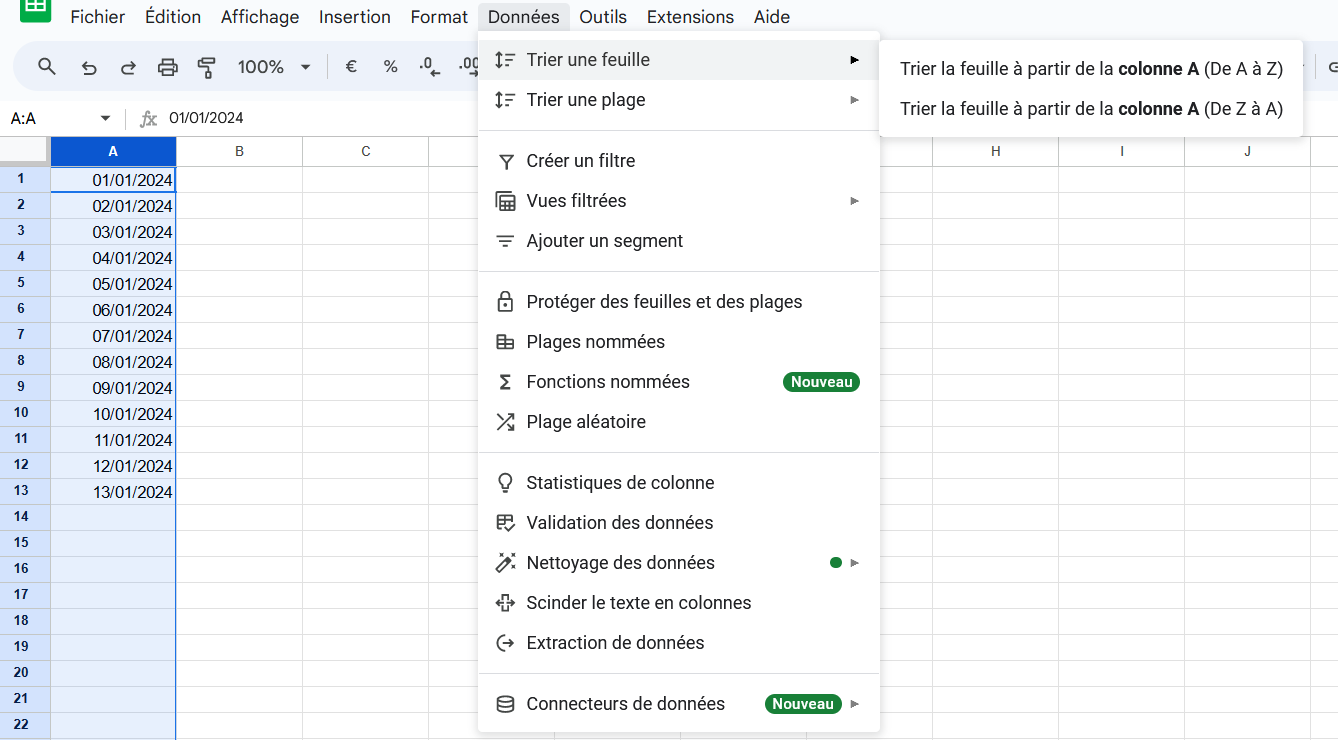
If you want to sort your Google tables by date, there is a handy trick for that. This is useful if you have many entries that are dated, but have not been entered in the correct order. You can safely rate the posts in any order. Then follow these steps:
- Click on the column in which the date is entered.
- Now choose the “Data” menu from the top tab.
- Click “Sort Spreadsheet”. You can choose whether the sorting should be done in descending or ascending order.
Use the many features of Google even more efficiently thanks to the Google Workspace solution offered by IONOS. Use Gmail with your IONOS domain, collaborate in real time with your team on documents and benefit from privileged Google support!


