It’s easy to create an SSH key pair in Ubuntu, using the terminal. You then simply transfer the public key to your server, then take advantage of the possibility offered to you to establish a secure connection there. Discover with us the details of the different steps to follow.
What is an SSH key?
If you want to establish secure connections using the SSH protocol, you can authenticate using SSH keys and without entering a password. To do this, you need an SSH key pair, which consists of a public key and a private key. The public key is for the system with which you want to establish the SSH connection in question; it can for example be a server. The private key, for its part, must benefit from special protection. After its creation, it is stored on the client side (at your home); you then need to use it to decipher the public SSH key when establishing the connection.
SSH keys are used today with a large number of services. Since the end of 2021, the SSH protocol is one of the two authentication methods available to access the command line in GitHub. If you want to learn more, check out our article titled “Using an SSH key with GitHub”.
Create and configure an SSH key in Ubuntu: step by step
Do you want to connect securely to servers or certain services, all without having to enter a password? SSH key pairs are the authentication solution for you. Using the steps outlined below, walk through an example based on Ubuntu 22.04 with us and learn how to generate SSH keys under Ubuntu and to configure them to authenticate on a serverin order to use SSH keys for your own network connection.
Are you looking for a secure solution to host your files? Don’t wait any longer to rent your SFTP server with IONOS to transfer and store your data securely using SSH and FTP protocols!
Step 1: Create an SSH key pair
You can quickly generate SSH keys under Ubuntu: go directly through the terminal to create a pair consisting of a public key and a private key at any time. Simply run the Ubuntu command line with the following command:
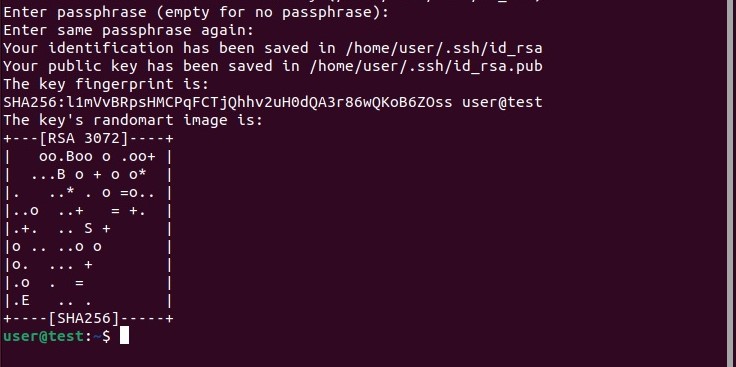
This allows you to automatically generate a RSA key pair with 3072-bit encryption, more than sufficient for most use cases. It is also possible to create larger keys (4096 bits); To do this, simply add the “-b 4096” parameter to your command.
Once this command is executed, Ubuntu generates a key pair. The system then asks you if you want to save these SSH keys under the Ubuntu user directory (in the subfolder /.ssh) ; To confirm, press the “Enter” key. If this does not suit you, you can indicate another path.

Once the location of your key pair is defined, Ubuntu asks you to define a secret and secure phrase. This passphrase allows you to add a additional level of security to your encrypted authentication method, and therefore prevent any unauthorized user from connecting. Enter the phrase you want or leave this field blank if you think you don’t need this level of security.
Whatever you decide, complete this action by pressing the “Enter” key. You should normally receive an individual « randomart image » of your SSH keys; this one you confirms their good creation.

Not sure which version of the system you are currently working on? See the following article to learn how to view your version of Ubuntu.
Step 2: Transfer the public key to the server
At this step, you need to transfer the public key to the target system with which you plan to establish secure SSH connections. So you need the username that you use to connect to this system, but also theIP adress or the domain of the latter. Don’t have a username yet? Please note that it is possible to use the “root” user in this type of case.
For transferring the public SSH key, Ubuntu offers the tool ssh-copy-id by default. The syntax of the corresponding command is as follows:
ssh-copy-id username@ip-adresse/domainbash
During your first connection to the target host, the terminal returns a message specifying that it is impossible to establish authentication of the host (“Authenticity of host […] can’t be established » in English). Type “ yes » and confirm your entry to continue your configuration.

The service will now search for the key you created. If it finds it, you can continue the process. To do this, enter the password for connecting to the target system. This marks the end of the configuration. If the public key has been successfully transferred, the service returns the result following :

Step 3: Perform SSH authentication at the target host
You can now log in to the device or server with the public key at your leisure using the SSH protocol. As with the key transfer, you must use the username and theIP address or domain of the target host. You must include these in your order, in the following order:
ssh username@ip-adresse/domainbash
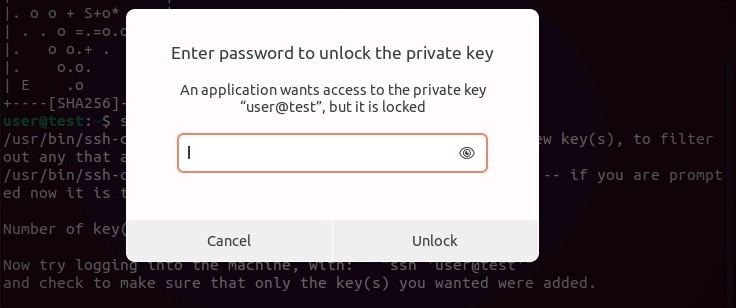
If you have defined a passphrase for key pair, you will then be asked for this. So enter the corresponding phrase and select “ Unlock » to log in to the target system.

Step 4: Disable password entry
If you successfully connected using the SSH key pair, you will no longer need to use the login using a password. As a general rule, however, this authentication procedure remains active, even if only for unauthorized persons wishing to access the system, in particular through a brute force attack.
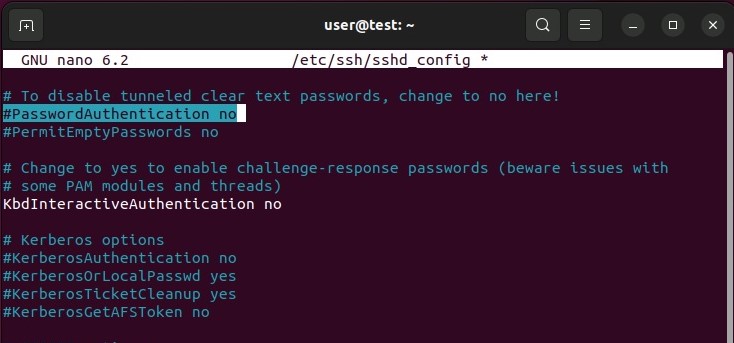
For added security in this regard, you can disable password login on the server or on the target device. To do this, log in using the SSH protocol, then open the SSH service configuration file :
sudo nano /etc/ssh/sshd_configbash
In the configuration file, then find the entry “ PasswordAuthentication » and set it to “ no « .

Save the changes you made to the configuration file, and then restart the SSH service using the following command:
sudo systemctl restart sshbash
Manually transfer an SSH key in Ubuntu
The tool ssh-copy-id, as discussed in step 2, is not available on all systems. If yours is affected, know that it is very easy to transfer manually the public key created by you to the target system.
Start with display your public key by running the following command:
cat ~/.ssh/id_rsa.pubbash

Now copy this key to the file “ authorized_keys » from the directory « ssh » of the target host. If this directory does not yet exist, you must create it by using the following command:
To transfer the key, simply run this command:
echo clé >> ~/.ssh/authorized_keysbash
In this command, replace « key » with the result obtained previously, starting with « ssh-rsa ».
Finally, be sure to remove all group and other permissions for the “ssh” directory and the “authorized_keys” file.
For more information about the SSH protocol and the Ubuntu operating system, see the following articles from our digital guide:


