The WooCommerce REST API allows you remote access to the administration area of your WooCommerce store. Basic operations such as “Read” or “Create” are handled by HTTP requests. The WooCommerce REST API can be activated directly in the back-end.
What is a REST API?
The resources of a system that can be addressed by REST (Dpresentational State Transfers) are defined in an API. Such an interface is one of the best solutions allowing web-enabled systems to communicate easily and efficiently between the Client and the Server.
Each resource is assigned parameters that describe it while being able to be modified. REST architectures are realized using the HTTP protocol, all resources that can be addressed through a Single URI (Uniform Resource Identifier). Parameters are appended as URL parameters, and access to resources is via the standard HTTP actions GET, POST, PUT, and DELETE.
What is a REST API used for in WooCommerce?
The most important feature of the WooCommerce API for REST access is its universality. It was designed to allow a WooCommerce store to easily interact with other sites or services on the Internet. This versatile interactivity with other web applications not only benefits developers, but also all users of the store platform, as these examples from benefits of using WooCommerce API :
- Platform independent access : Directly access WooCommerce dashboard with a third-party application? This is possible thanks to the REST API.
- Easy integration of business logic : The WooCommerce REST API makes it easy to integrate enterprise-specific software and hardware, such as wearables or IoT trackers, into the project.
- Optimized data synchronization : Companies that want to synchronize data across different platforms and channels with their WooCommerce store have the right interface with the REST API.
- Independence from the WooCommerce back-end : by activating the Universal WooCommerce API, you become independent of the back-end of WooCommerce or WordPress. You can integrate and use your own administration space at any time.
- Easy third-party data integration : The REST interface gives you easy access to all third-party application-based data.
- Link to mobile apps : Linking your WooCommerce store to a mobile app is significantly easier through the versatile interface.
Are you looking for a new hardware environment or a hardware environment adapted to your shop? WooCommerce hosting from IONOS offers you a secure and reliable basis for your online store project at a great price!
How to use the WooCommerce REST API: step-by-step instructions
If you want to use the WooCommerce API to interact with other web applications and services, you must first activate it by generating an API key. In addition, a Client must be installed for REST access. We have summarized the different steps for you in the following paragraphs.
Step 1: Generate a REST API key in WooCommerce
To use the WooCommerce REST API, you must first generate an API key. This key represents a kind of access control and will be used later by WooCommerce to authenticate REST requests.
Here’s how to generate a key:
- Login to WooCommerce or WordPress back-end.
- Call the position » WooCommerce » from the left side menu.
- Click on » Settings »
- Switch to the » Advance « .
- Select the “REST API” sub-section.
- Click on » Add key » Or » Create an API key « .
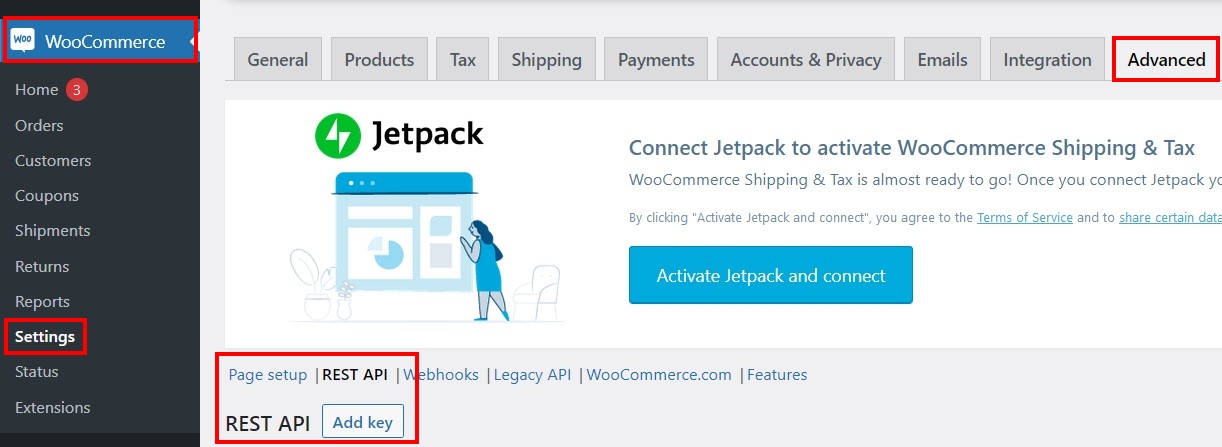
Three characteristics must be entered for the key: under » Description », you enter a brief information that will allow you to recognize the key. On the line » User », you select the WooCommerce user for which access to the interface must be generated. Determine under » Rights if the user should have read-only or write-only access, or both.
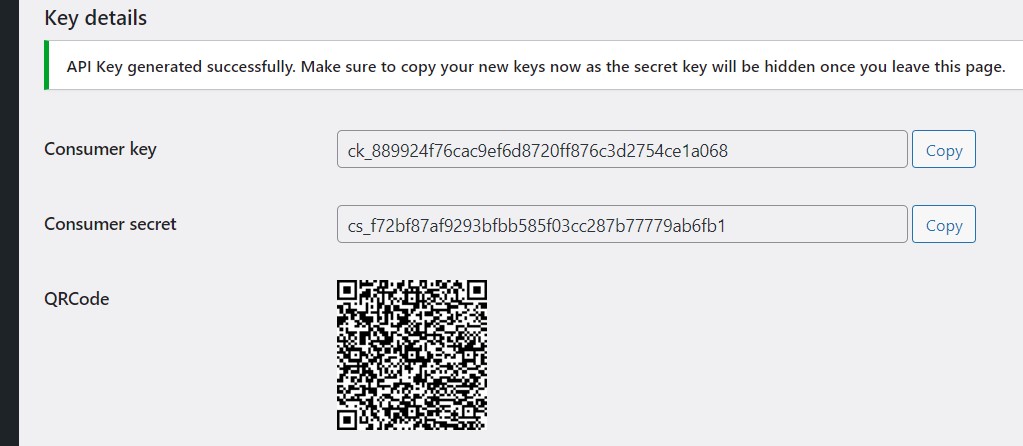
As soon as you confirm your entries by clicking on » Generate an API key », WooCommerce creates two alphanumeric character strings, a client key and a client secret key, as well as a QRCode. Copy the two keys and save the strings to a document. You will need it later when you want to access the WooCommerce API with a REST Client.
Step 2: Download the API Client
Once a key is generated, you can send your requests to the shop system interface. However, it is necessary to have an API Client that allowssend queries and view responses received.
The most popular Clients for REST access are insomnia And Postman. Both tools are available as a desktop app for Windows, macOS, and Linux. You can also use Postmanwhich we use as part of our tutorial, as a web application directly in the browser.
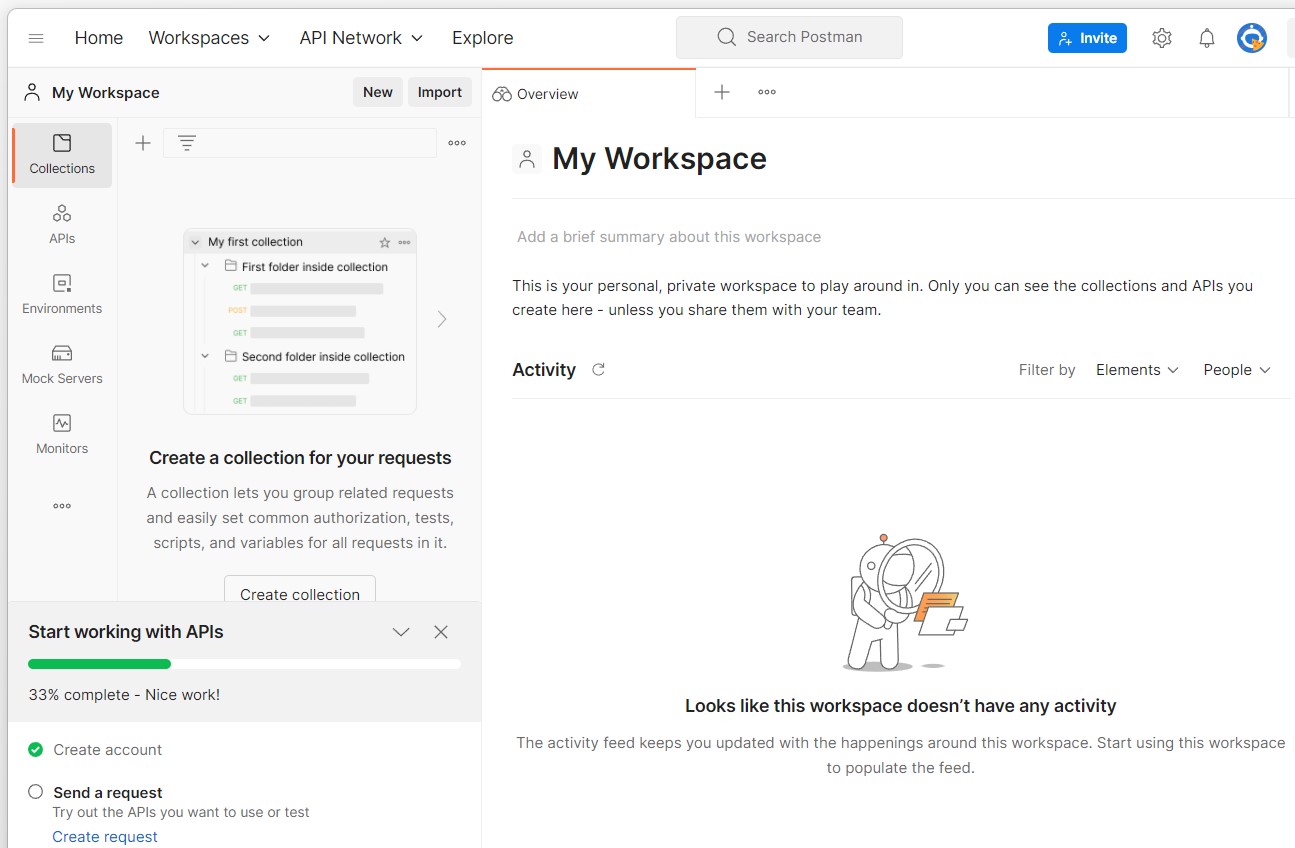
Installing and configuring Postman works as follows:
- Call her Postman download page and download the version corresponding to your system.
- Run the Postman configuration file by double clicking on it.
- Create a Postman account by entering a valid email address, username and password. You can also sign up with an active Google Account.
- Enter the requested information and send invitation links to your colleagues (if you wish).
Are you still looking for a suitable Internet address for your WooCommerce project? Register your custom domain name with IONOS today and get a free SSL/TLS certificate and domain transfer lock for your WooCommerce store!
Step 3: Run a WooCommerce API request
After configuration, you can test access to the REST API by sending a first request. To do this, go to your workspace and click on » Create new Request (“Create a new request”).
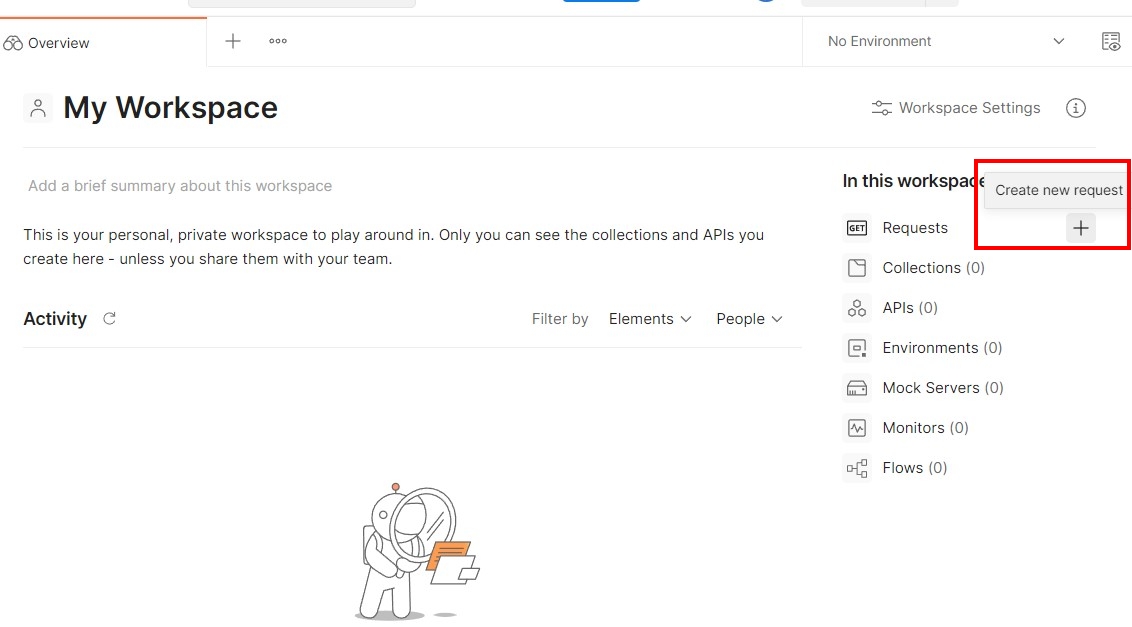
For the first test, we select a GET request to call data. In Postman, this method is selected by default, so you can keep this choice. On the Address Line following the « GET », instead of woocommerce-domain.xyzuse the address of your WooCommerce store:
https://woocommerce-domain.xyz/wp-json/wc/v3/ordersNext, insert your data for authentication using the WooCommerce REST API. The question here is whether the REST access is via HTTP or HTTPS (recommended). Switch to the » Authorization (“Authorization”) and, under “ Kind select either “OAuth 1.0” for HTTP or “Basic Auth” for HTTPS. Then enter the codes saved for your customer key and your customer secret key. In the case of Basic Auth, the key must be entered under « Username » and the secret key under « Password ».
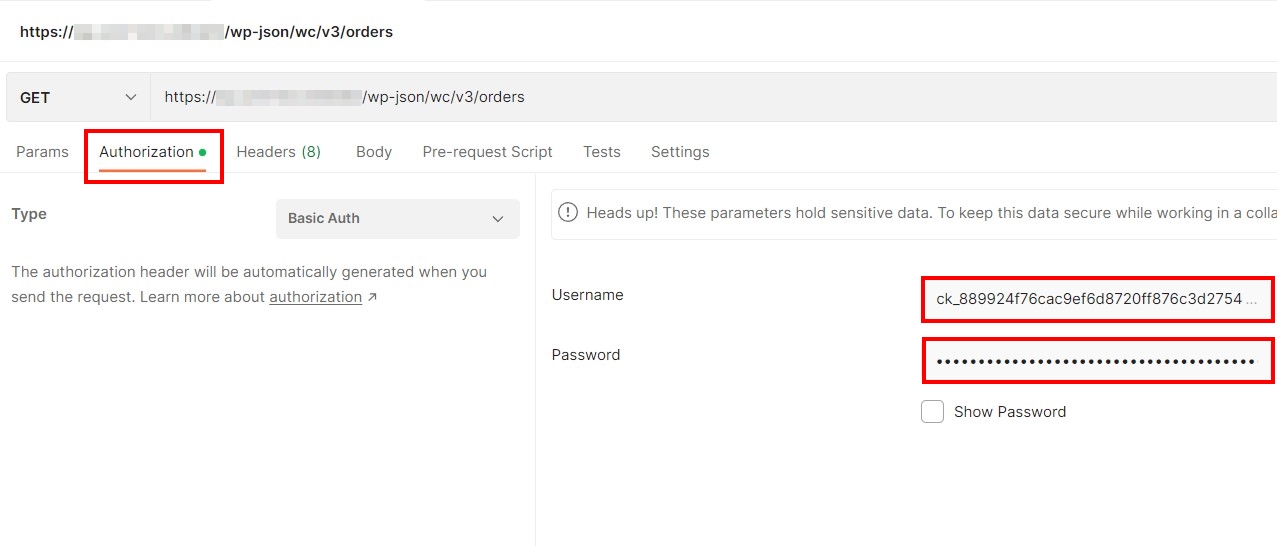
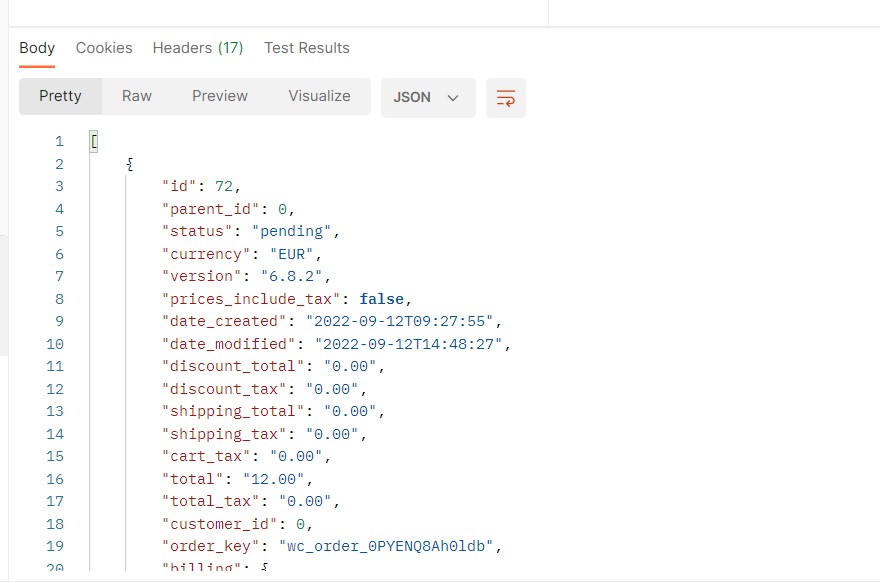
Once the authentication is configured, you press the » Send (“Send”) and the request is launched. In the case of the address defined above, you invoke all current commands with the GET request. Postman presents the result in the lower window optionally in JSON, XML, HTML or Text formats.
In the Digital Guide you will find many other exciting articles on WordPress and the popular WooCommerce store plugin:


